


The day before yesterday, Kabochan posted a new article on her blog (https://kabochan.blog.jp/archives/53553858.html), adopted a new dog, and cooperated with the Own The Doge community to launch the official token $cocoro, which was deployed on the BASE chain with a contract address of 0x937a1cFAF0A3d9f5Dc4D0927F72ee5e3e5F82a00.
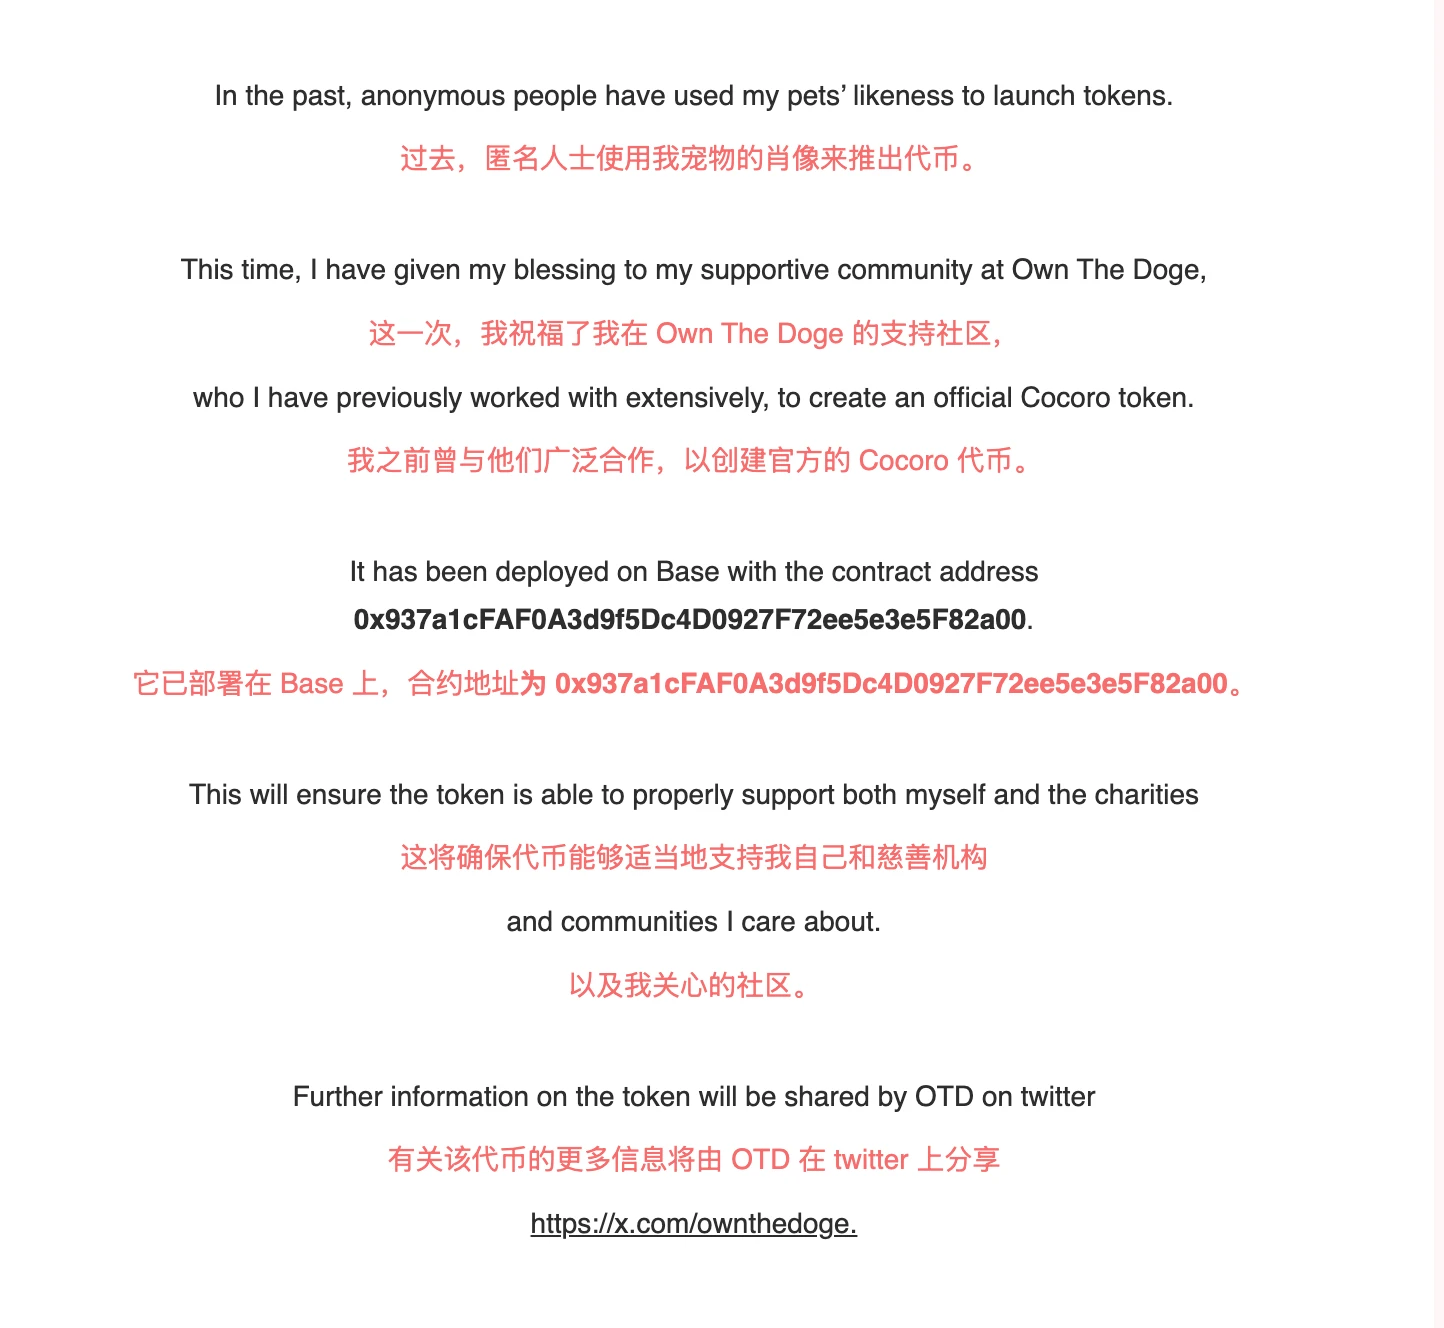
After this article was published, the price of the token continued to rise, and the market value exceeded 100 M in one hour. This article will explain the various operations of dev on the chain step by step.
1. How to verify the distribution of token economics
We can see the token economics of $cocoro in the official Twitter account of the Own The Doge community, where 75% is added to LP, 20% is community airdrops, and 5% is DAO reserves.
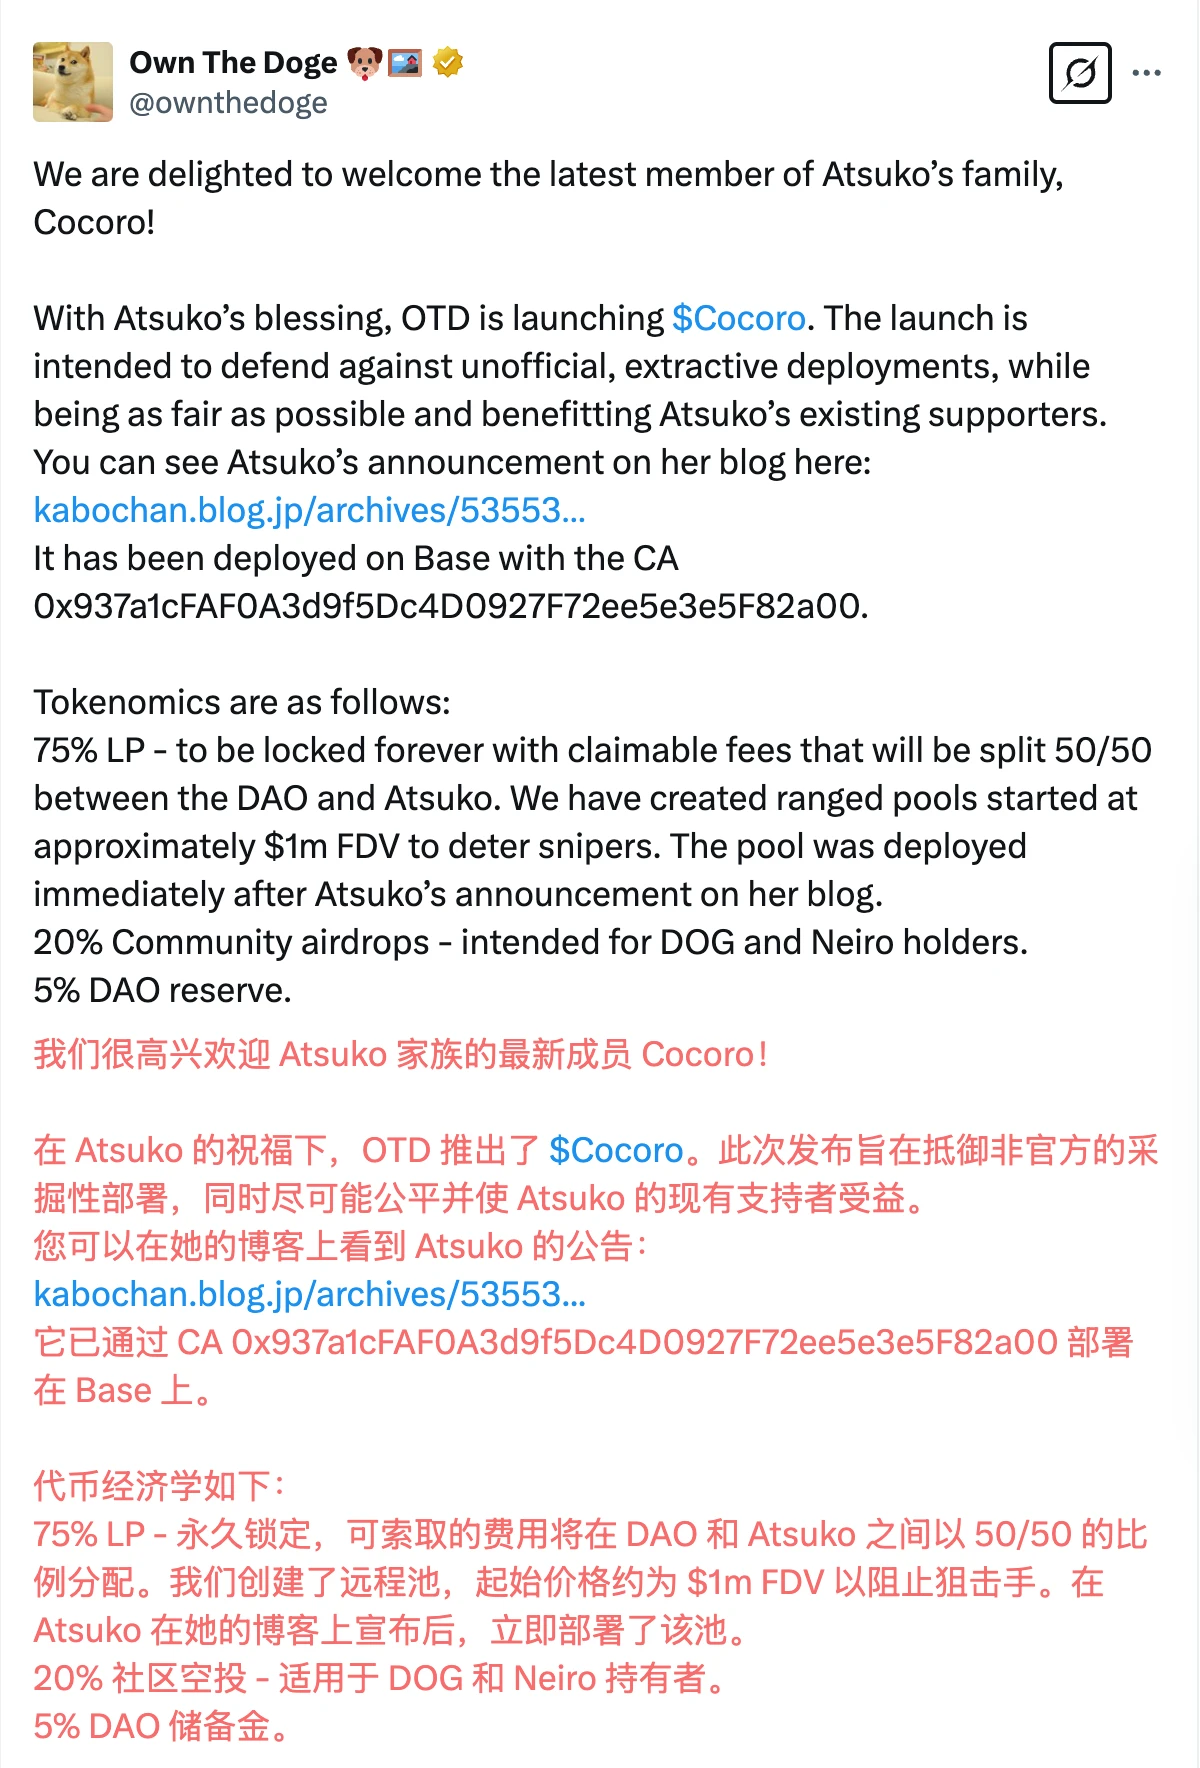
When looking at the token economics above, how do we verify that dev is allocated correctly according to the token economics?
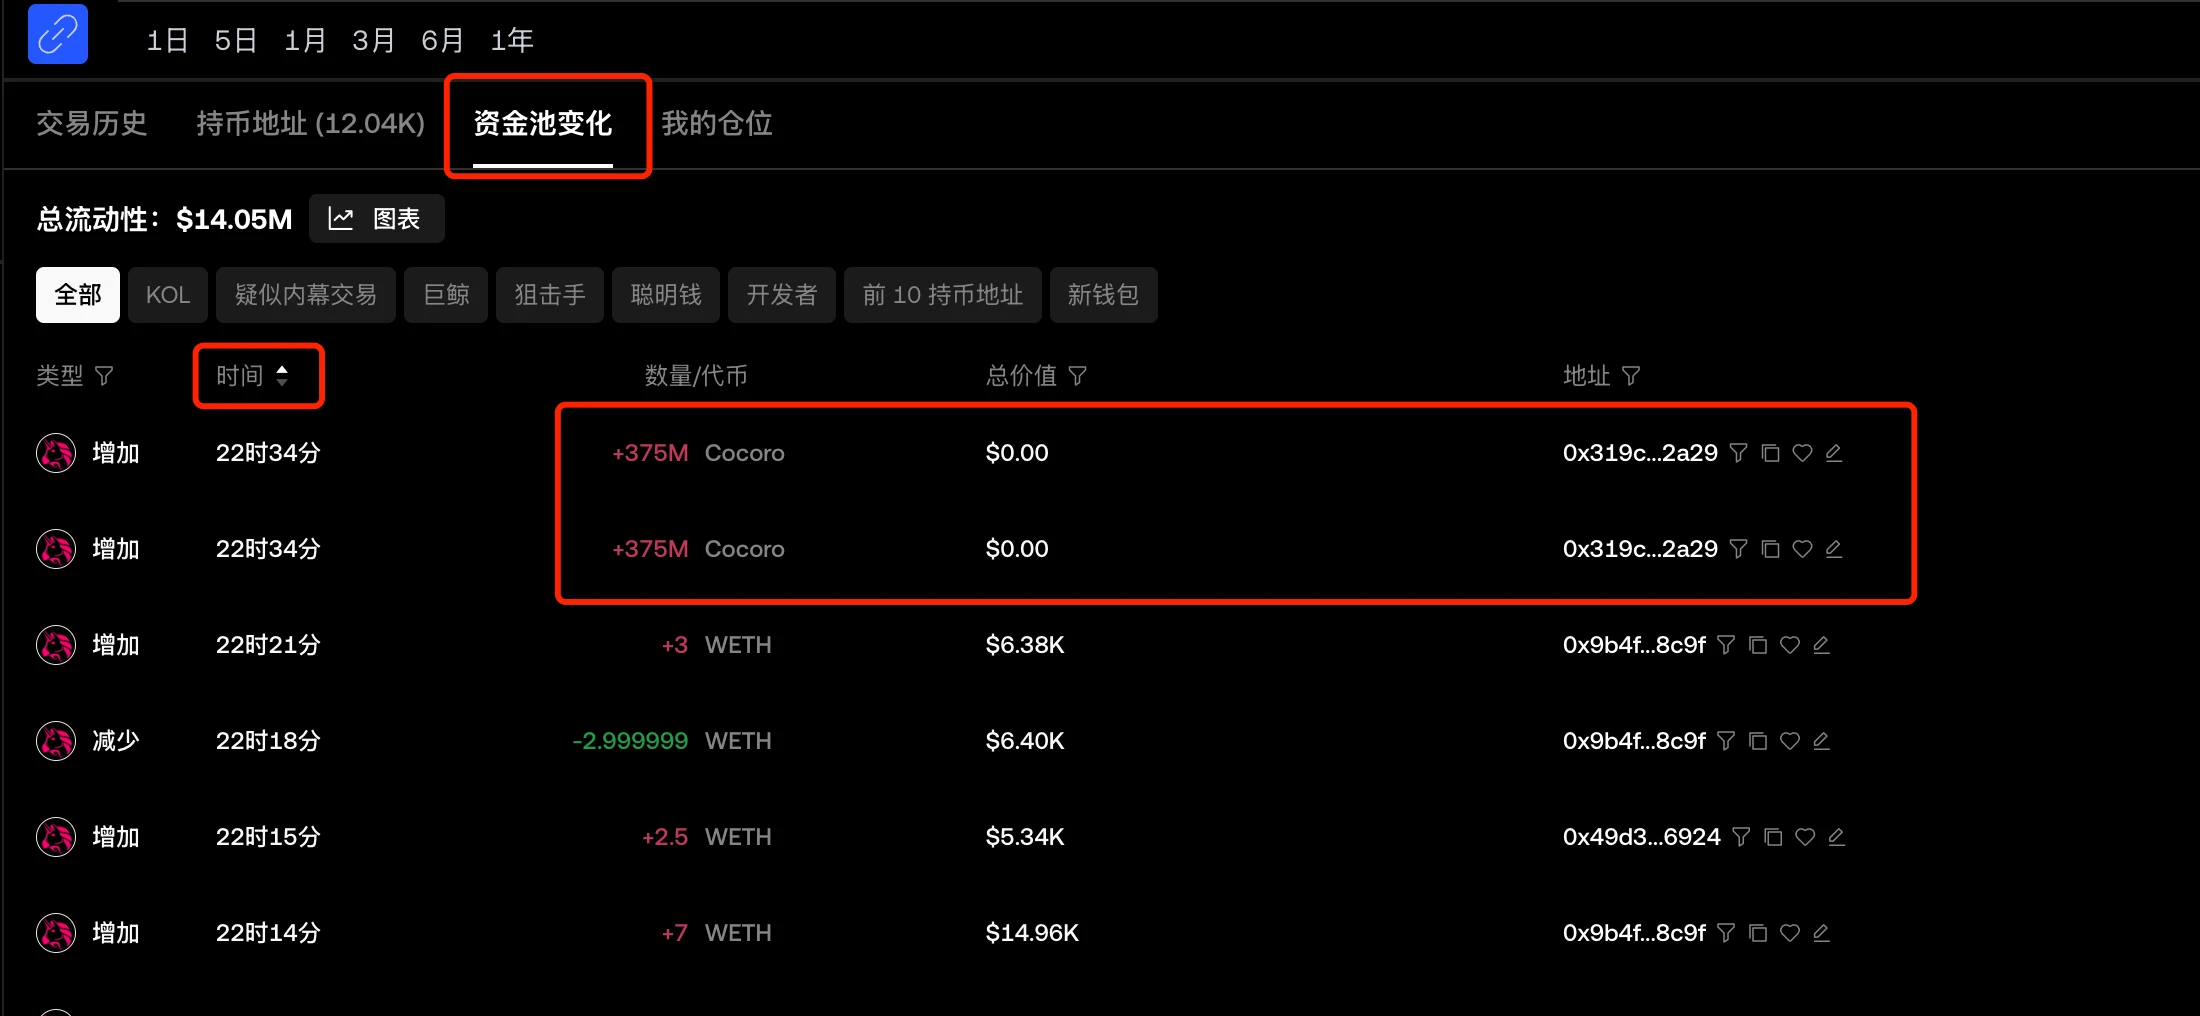
Commonly used tools have limited support for the BASE chain. Currently, the best and easiest-to-use tool for viewing changes in funding pools is okx.
We open the OKX web version and enter the CA of $cocoro (https://www.okx.com/zh-hans/web3/detail/8453/0x937a1cfaf0a3d9f5dc4d0927f72ee5e3e5f82a00). In the [Fund Pool Change] column, we can see all the pool addition and pool reduction operations. Arrange the [Time] in ascending order, and we can see the earliest two pool addition operations, each adding 375M of the $cocoro unilateral pool. The quantity of these two transactions is exactly 75%, which is consistent with the description in token economics.
In the [Coin Holding Address] column, you can see the address holdings. The second address on the list held 25% when it was first launched, which is in line with the 20% community airdrop and 5% DAO reserve in token economics. The second address on the list in the figure shows that it holds 26.38%, which is more than 25% because the dev received the handling fee for adding the pool, and the coins became more.

2. How to view dev operations
Several commonly used tools have average performance in identifying and operating the BASE chain dev address. We can use a block browser for analysis.
1. Find the dev address
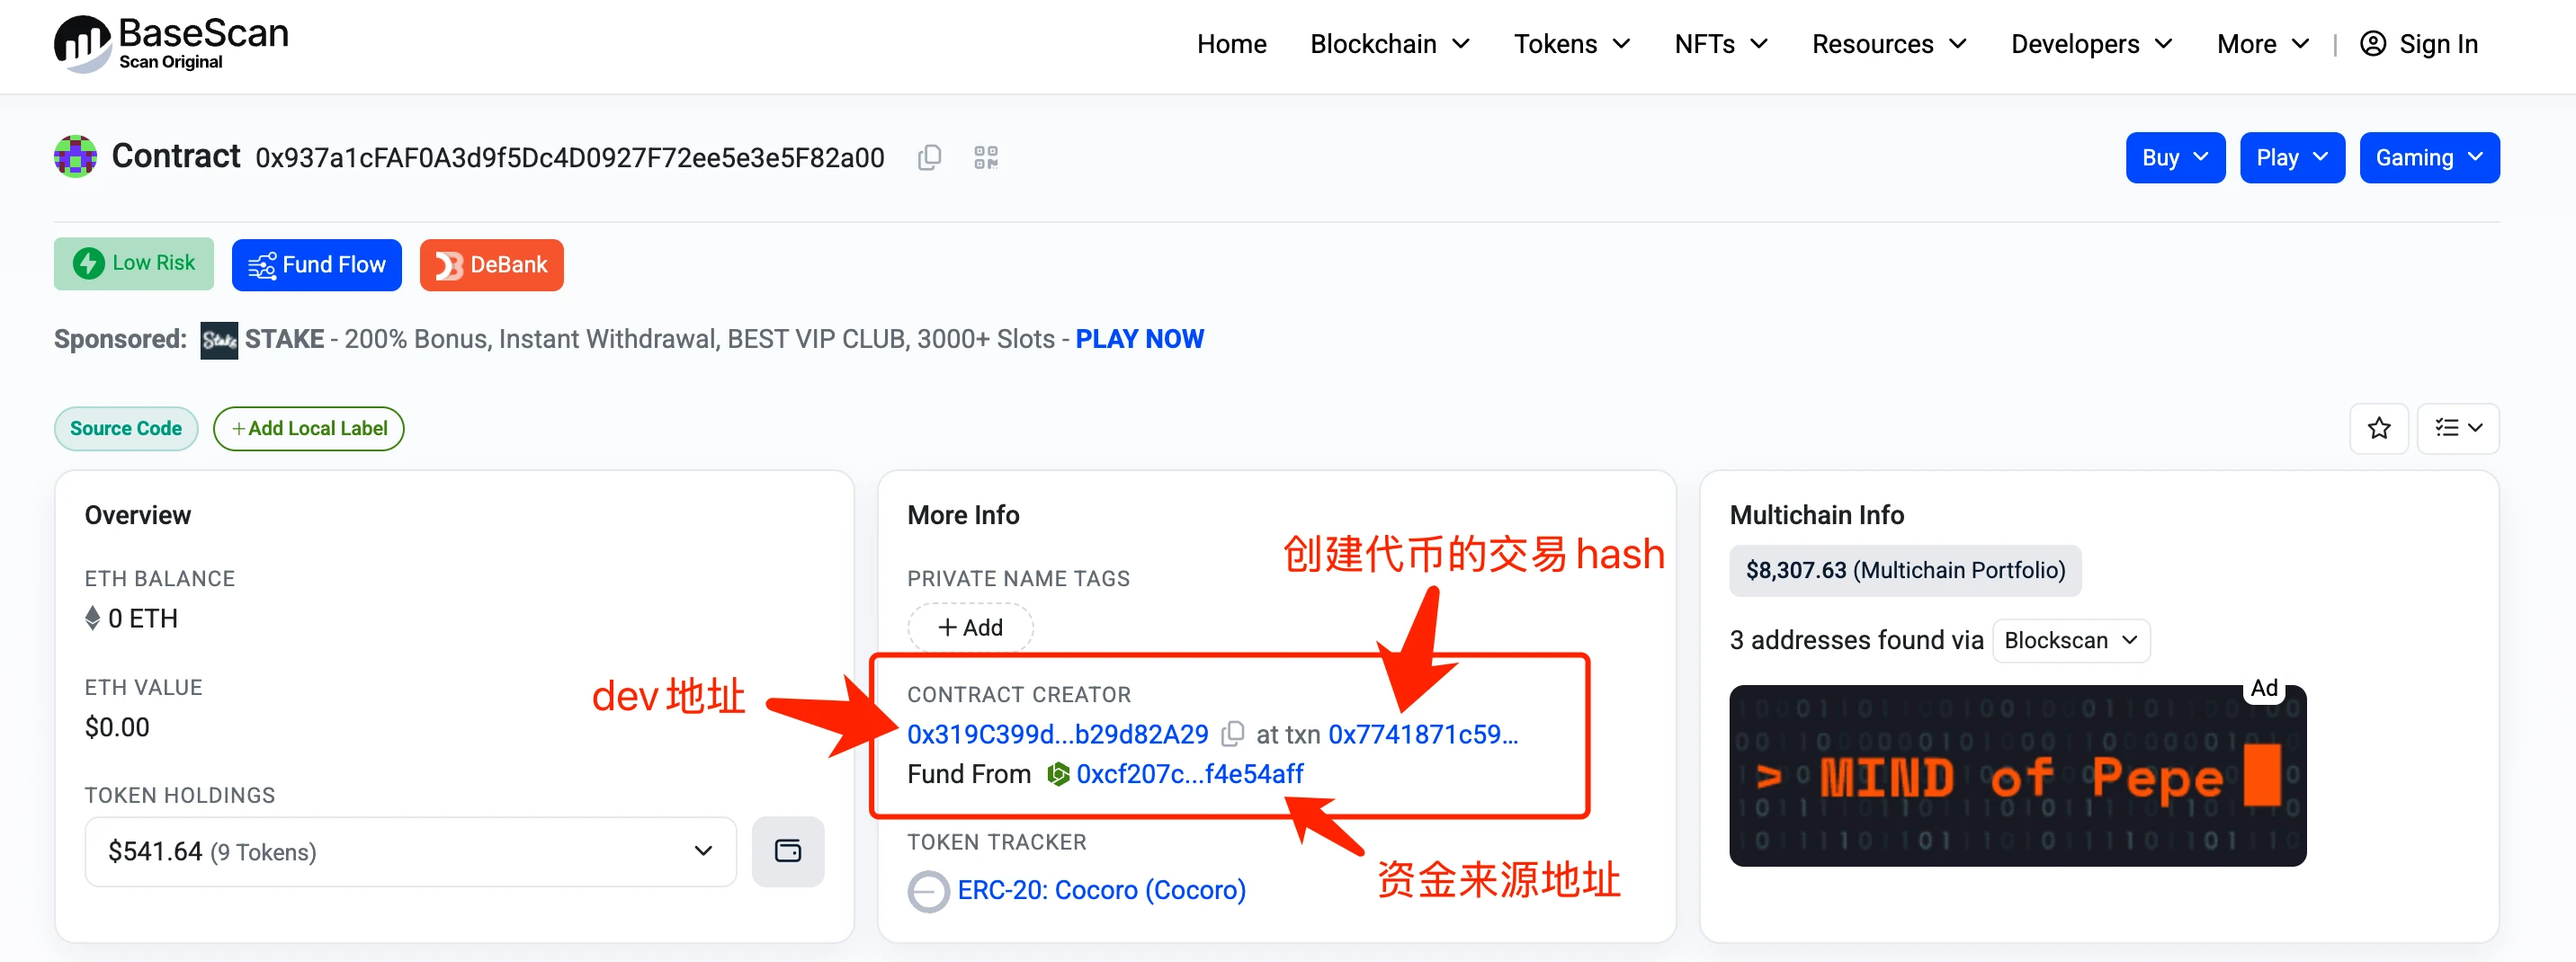
Open the block browser and enter the CA of $cocora (https://basescan.org/address/0x937a1cfaf0a3d9f5dc4d0927f72ee5e3e5f82a00). In the [More Info] column on the homepage, we can see the contract creation information, including the dev address, the transaction hash of the token creation, and the source address of the funds. From the figure, we can see that the dev address is 0x319C399d3D7d7A2972a6A59646A060Bb29d82A29
2. View dev operations
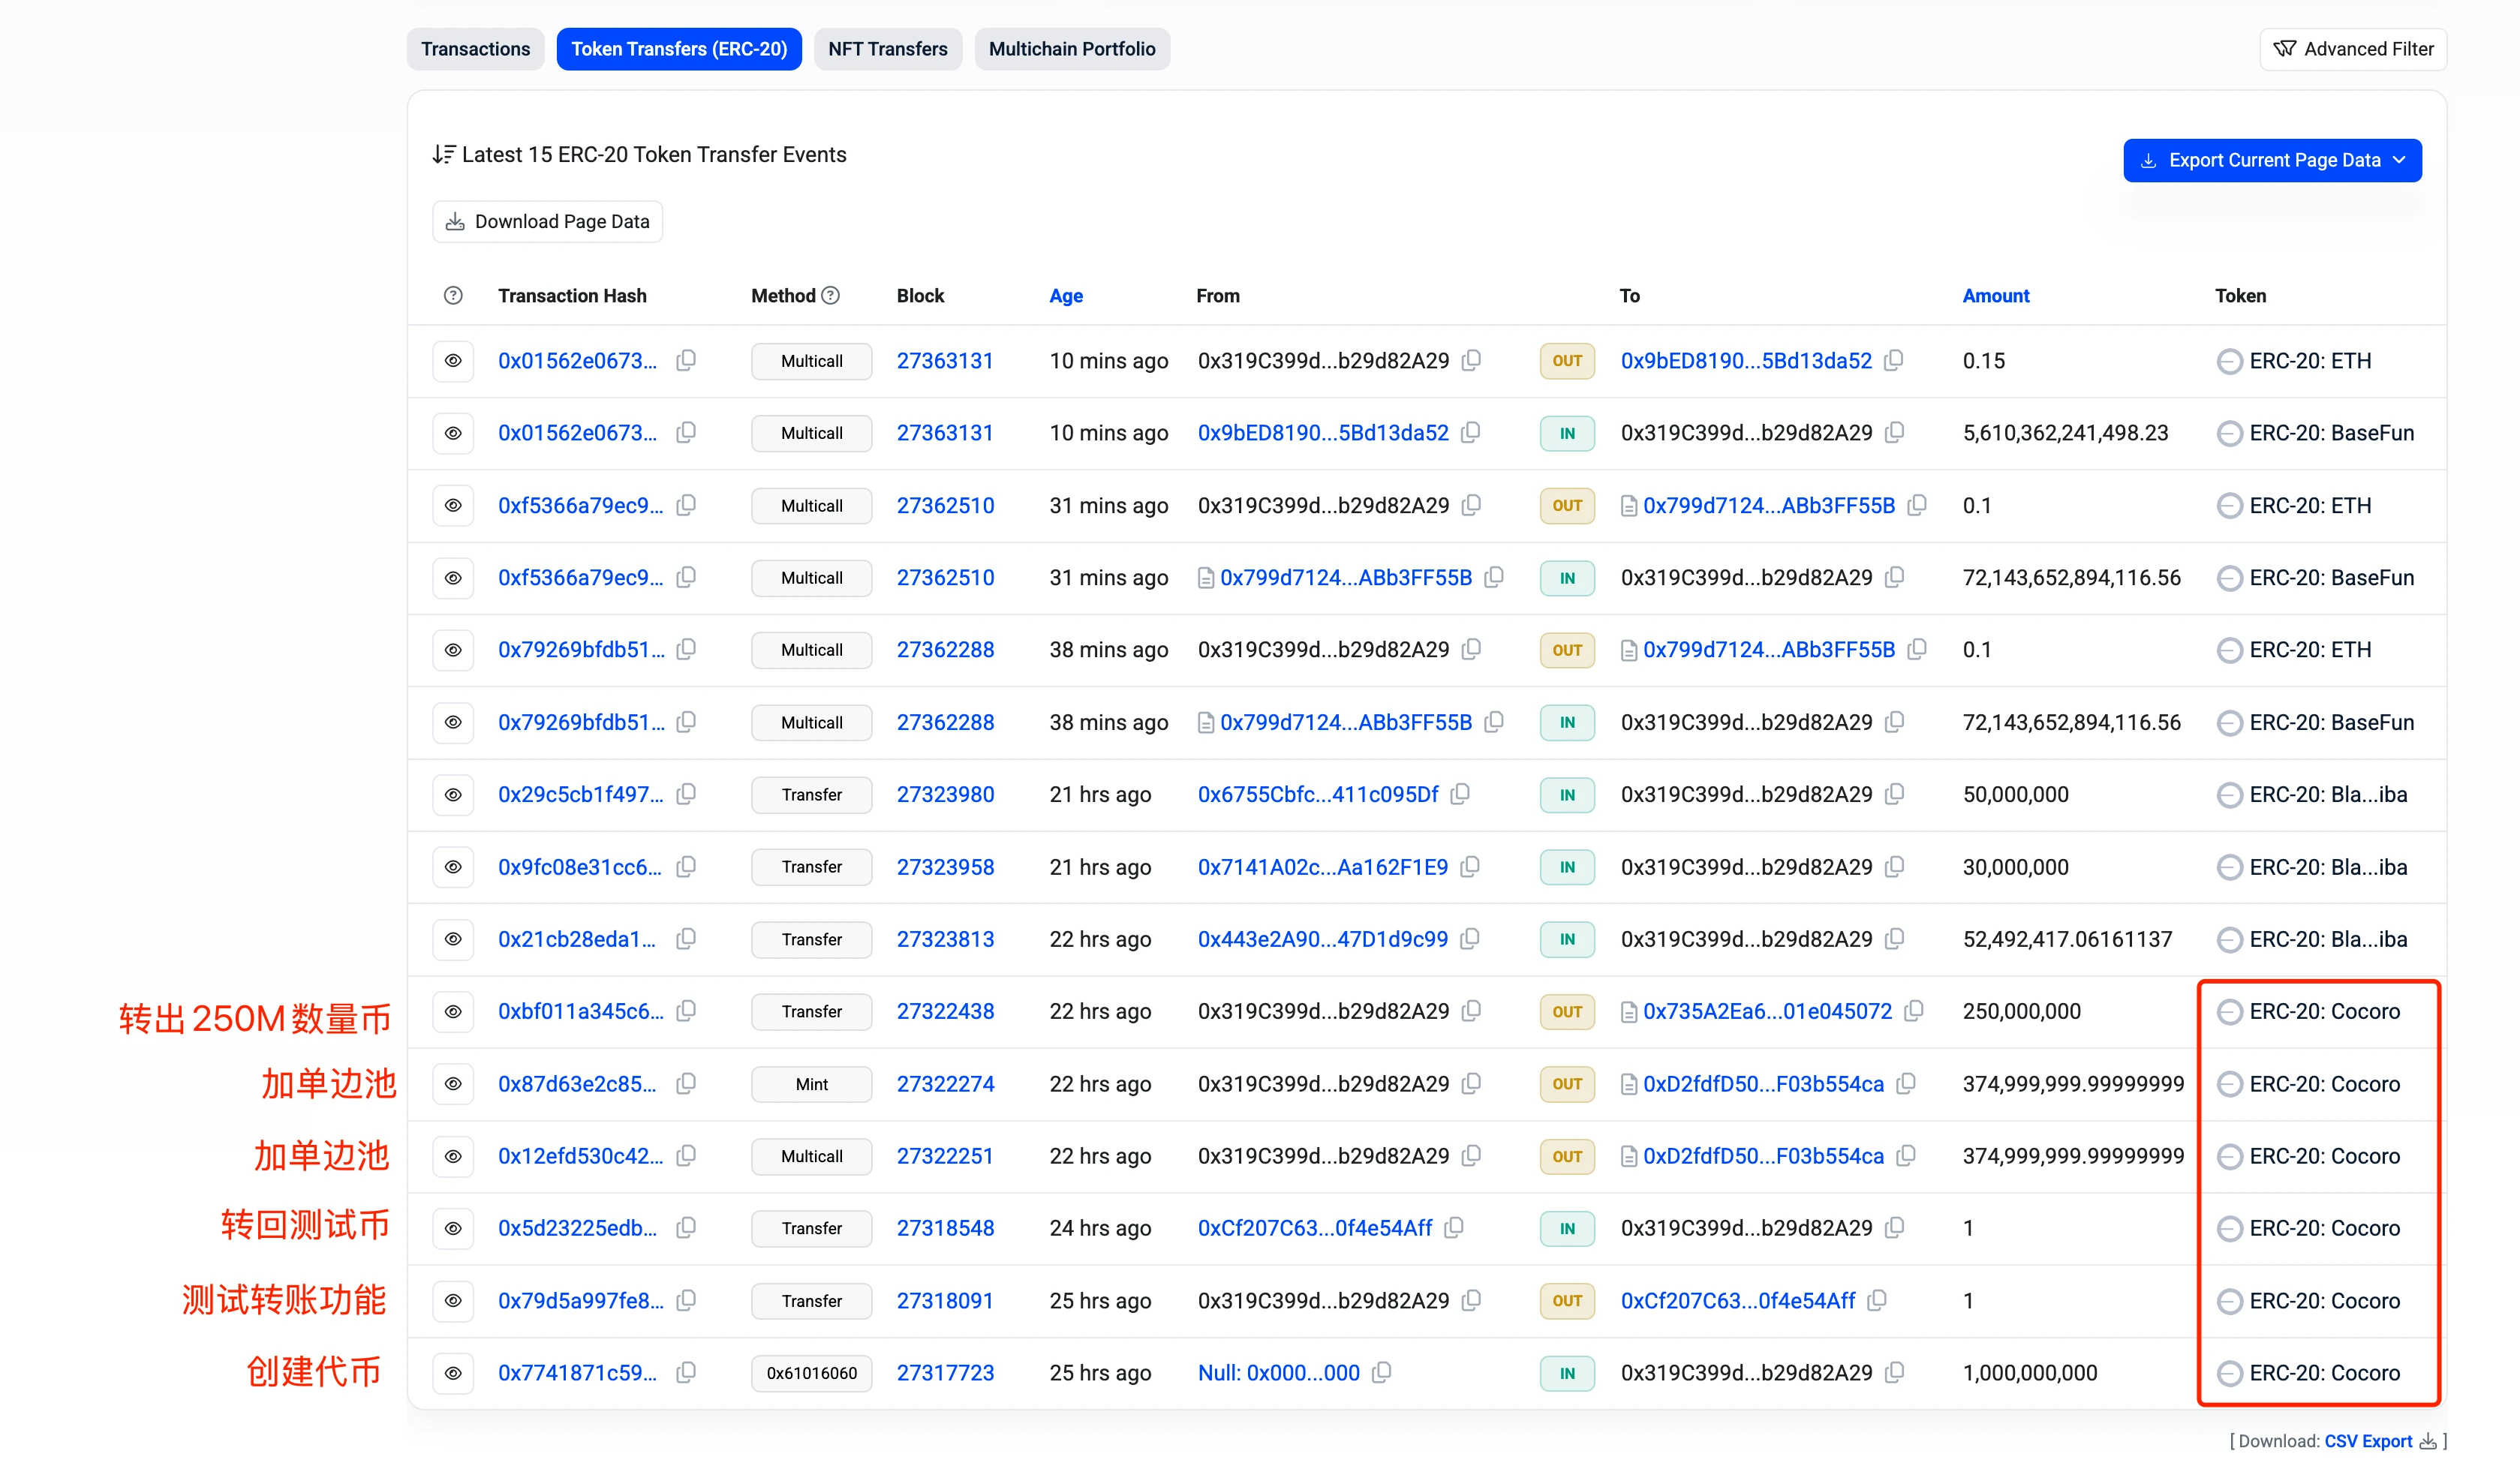
Enter the dev address 0x319C399d3D7d7A2972a6A59646A060Bb29d82A29 in the block browser (https://basescan.org/address/0x319c399d3d7d7a2972a6a59646a060bb29d82a29), open the [Token Transfers(ERC-20)] column, and only look at the transactions listed as ERC-20: Cocoro in the [Token] column. From bottom to top, each transaction is:
a. Create tokens and mint 1 B of tokens
b. Transfer 1 token to the test address to verify that the function is normal (this shows that the dev is still very cautious)
c. Transfer 1 token from the test address back to the dev address
d. Two transactions added 375M tokens to the one-sided pool respectively (corresponding to the adding pool part in Chapter 1)
f. Transfer the remaining 250M tokens to the address 0x735A2Ea69997e668dD0f4b2a30fFa9f01e045072
3. Check LP ownership
Adding a pool in Unisawp V3 will automatically mint an NFT. This NFT records the detailed information of the pool. Whoever owns this NFT owns the corresponding pool. The ownership of the pool can be transferred by transferring the NFT, and the pool can be locked by operating the NFT.
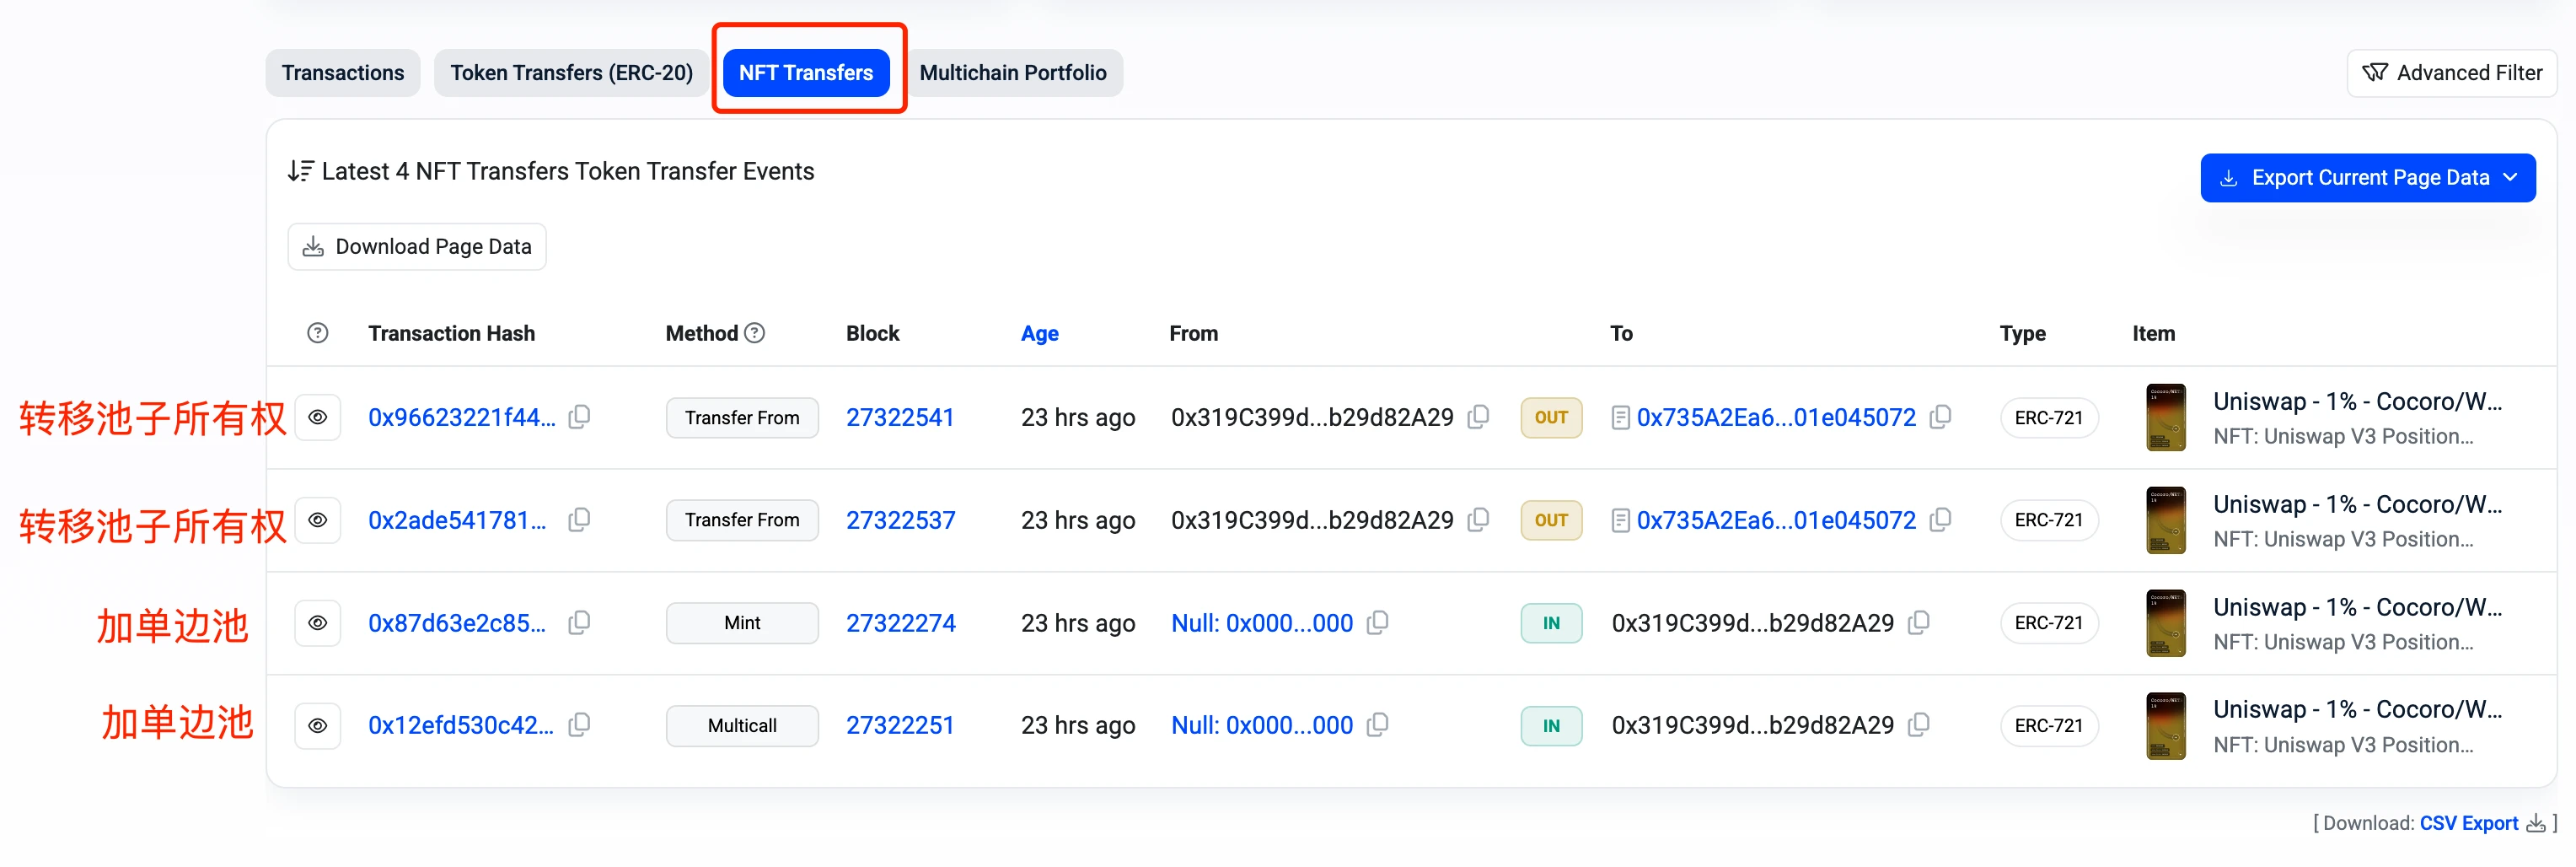
Open the [NFT Transfers] column in the dev address in the previous section to see the transfer status of NFT. From bottom to top, each transaction is:
a. The two transactions at the bottom are adding a one-sided pool and minting the corresponding NFT, compared to the transaction d in the previous section
b. Transfer the NFTs from the two pools to the address 0x735A2Ea69997e668dD0f4b2a30fFa9f01e045072 in two transactions
For the two transactions in a, we open any one of them and check the transaction details to get the Token ID of the NFT. For example, open the last transaction in the above figure (https://basescan.org/tx/0x12efd530c4245216596993c780075770484622cd68e9cd85e18497bf93bacd81), check the details and you can see that dev transferred 375M coins to an address, but not to weth, which means that this is a unilateral pool added, not a bilateral pool. In the following part, you can see that the Token ID of the NFT corresponding to this pool is 2256046, as shown in the figure.
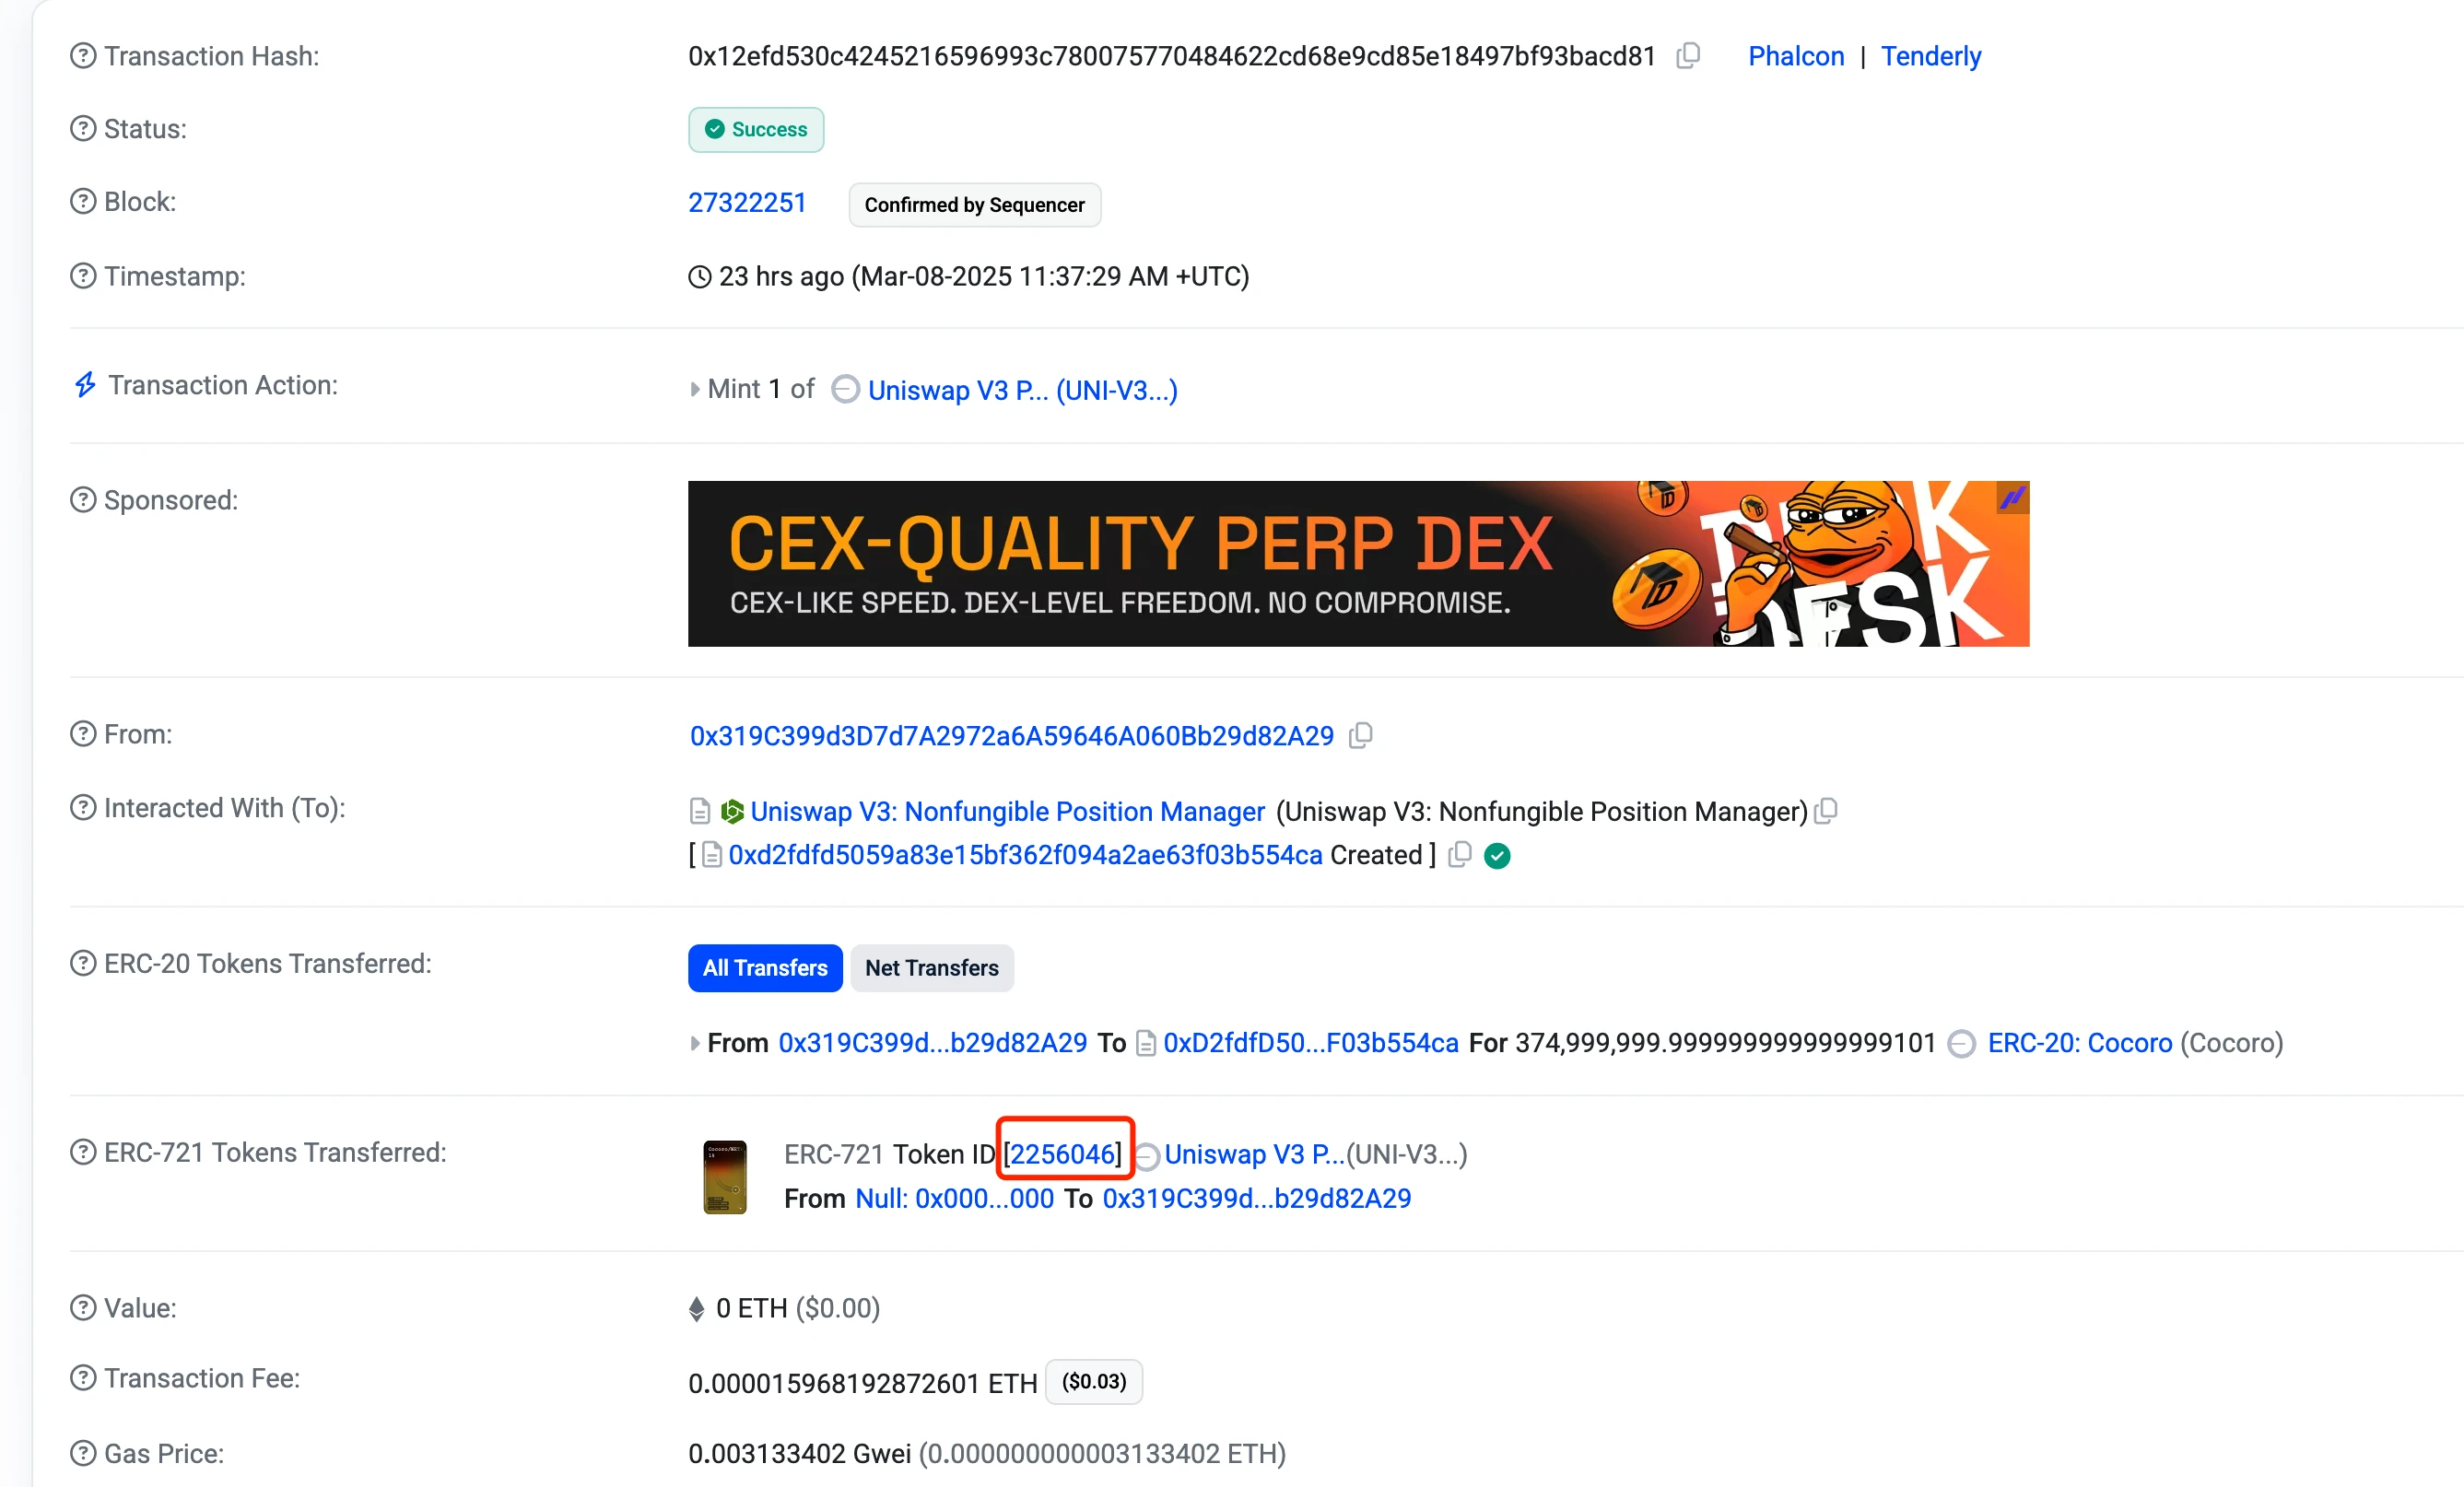
Similarly, we can see that the Token ID of the NFT corresponding to another pool-adding transaction is 2256052.
4. Verify whether the pool is locked
The official Twitter account of the Own The Doge community mentioned that 75% of LPs are permanently locked, so how can we check if there is any lock? From the previous section, we know that dev transferred the ownership of the pool to the address 0x735A2Ea69997e668dD0f4b2a30fFa9f01e045072, so we need to check if this address has any behavior of locking the pool.
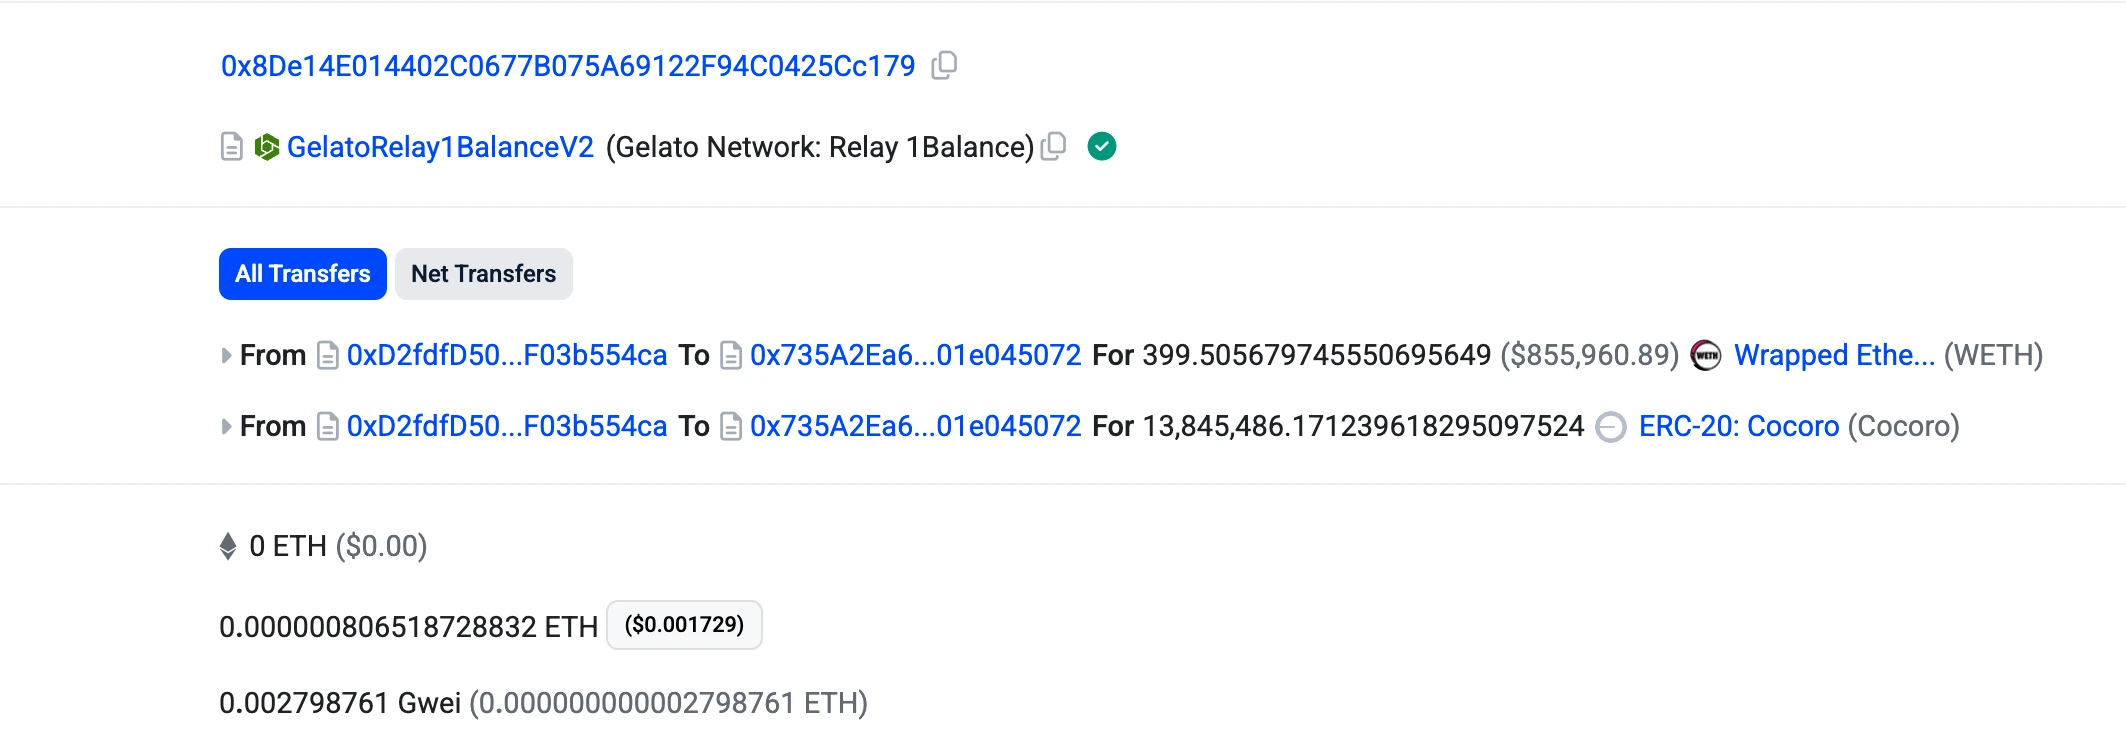
Enter this address (https://basescan.org/address/0x735a2ea69997e668dd0f4b2a30ffa9f01e045072) in the block browser, and check the transactions in the [Transactions] and [Token Transfers (ERC-20)] sections. No transactions related to the lock pool are found, indicating that the lock pool mentioned in the official push has not been done yet. Only one operation of collecting handling fees is seen (https://basescan.org/tx/0x316d0ea27ae38fd33b694e2bb444c5ec1567a56b7e4b403ec257d3c0ccb1a124), and the handling fee collected is worth about 1.7 million U.
3. How to view detailed information of LP
From the above, we can see that dev initially added two one-sided pools. So how to view the detailed information of these two one-sided pools, such as the range price and the generated handling fees?
1. Use the Uniswap official APP
Open the Uniswap website https://app.uniswap.org/, download the corresponding APP according to the type of mobile phone, and in the wallet settings [Add wallet]--[Add view-only wallet], enter the address 0x735A2Ea69997e668dD0f4b2a30fFa9f01e045072 that owns the pool.
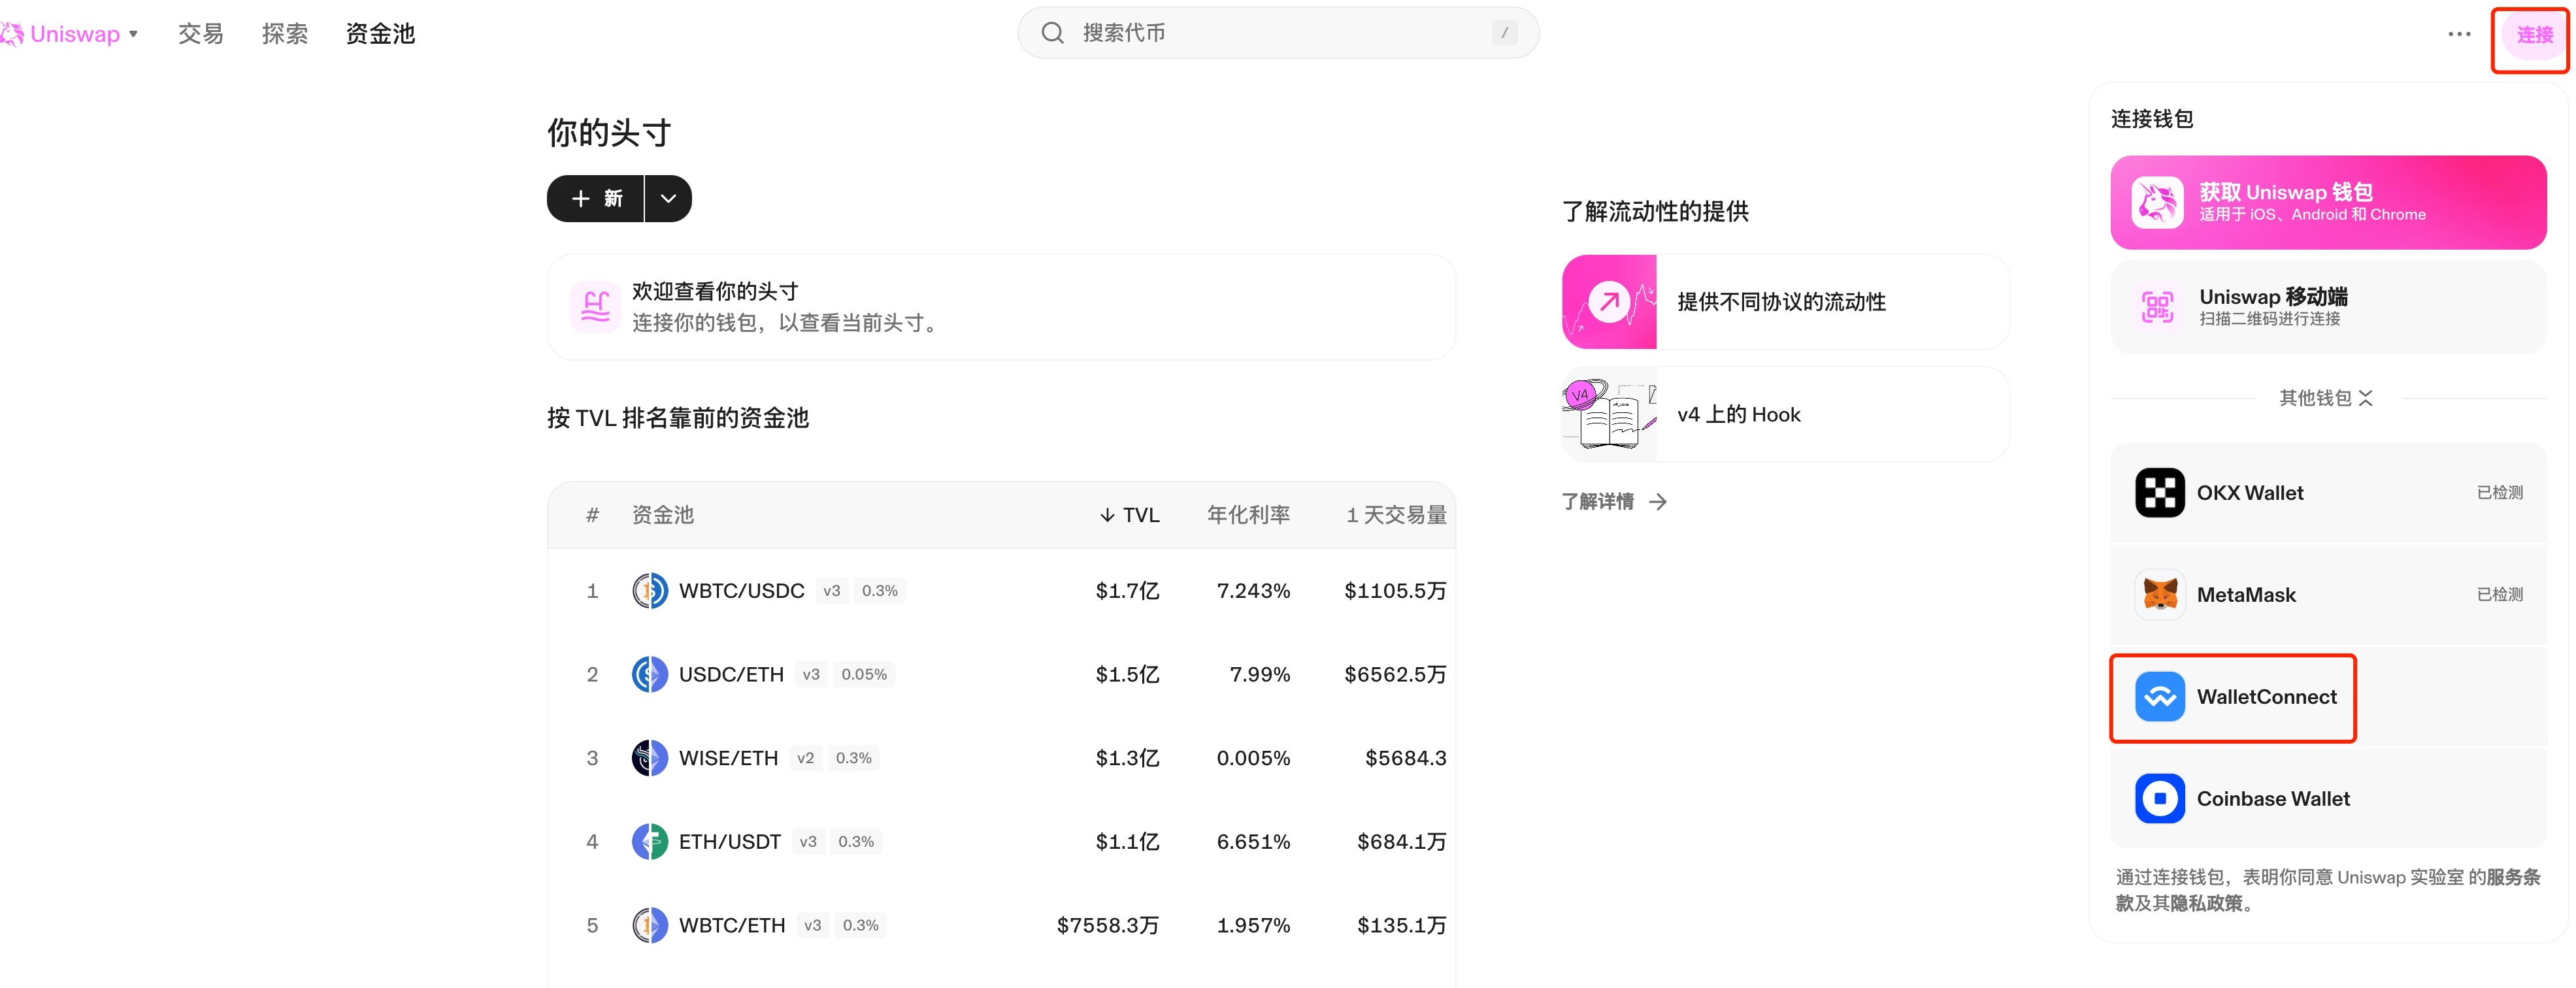
In the upper right corner of the Uniswap website, select [Connect] from [Uniswap mobile app scan QR code to connect]. A QR code will appear on the page. Scan it with Uniswap on your phone and click “Connect”.
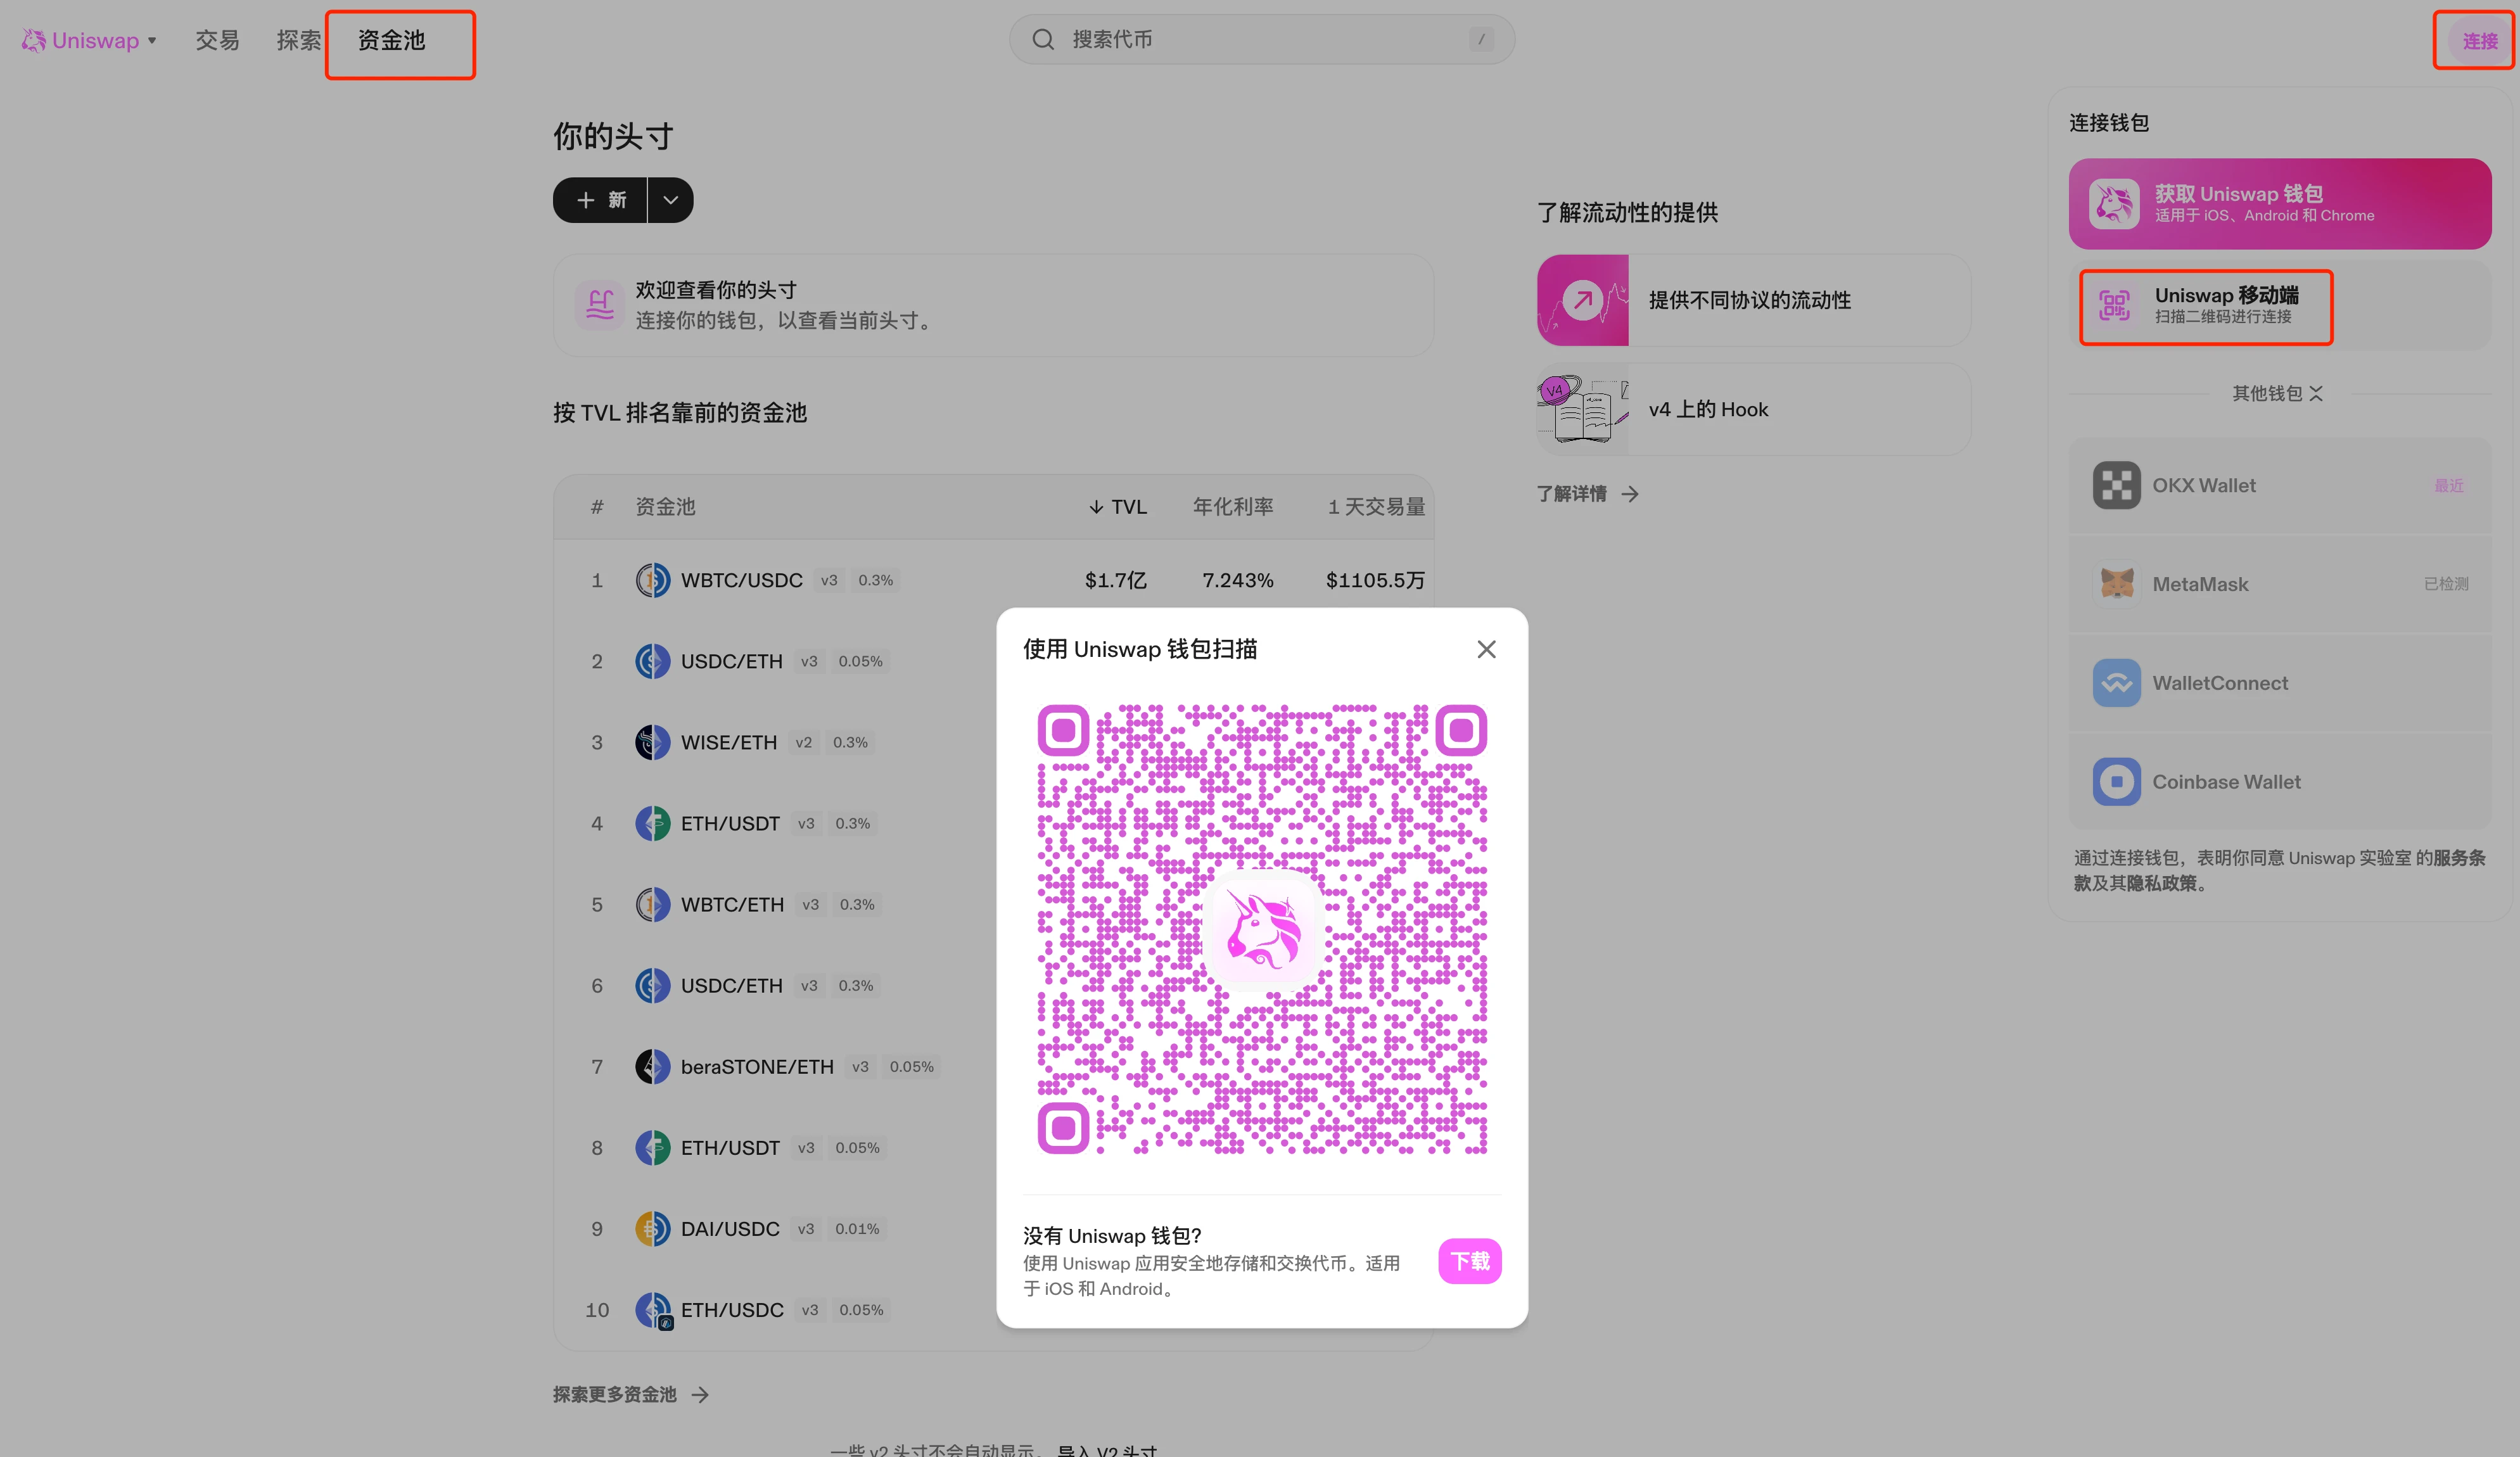
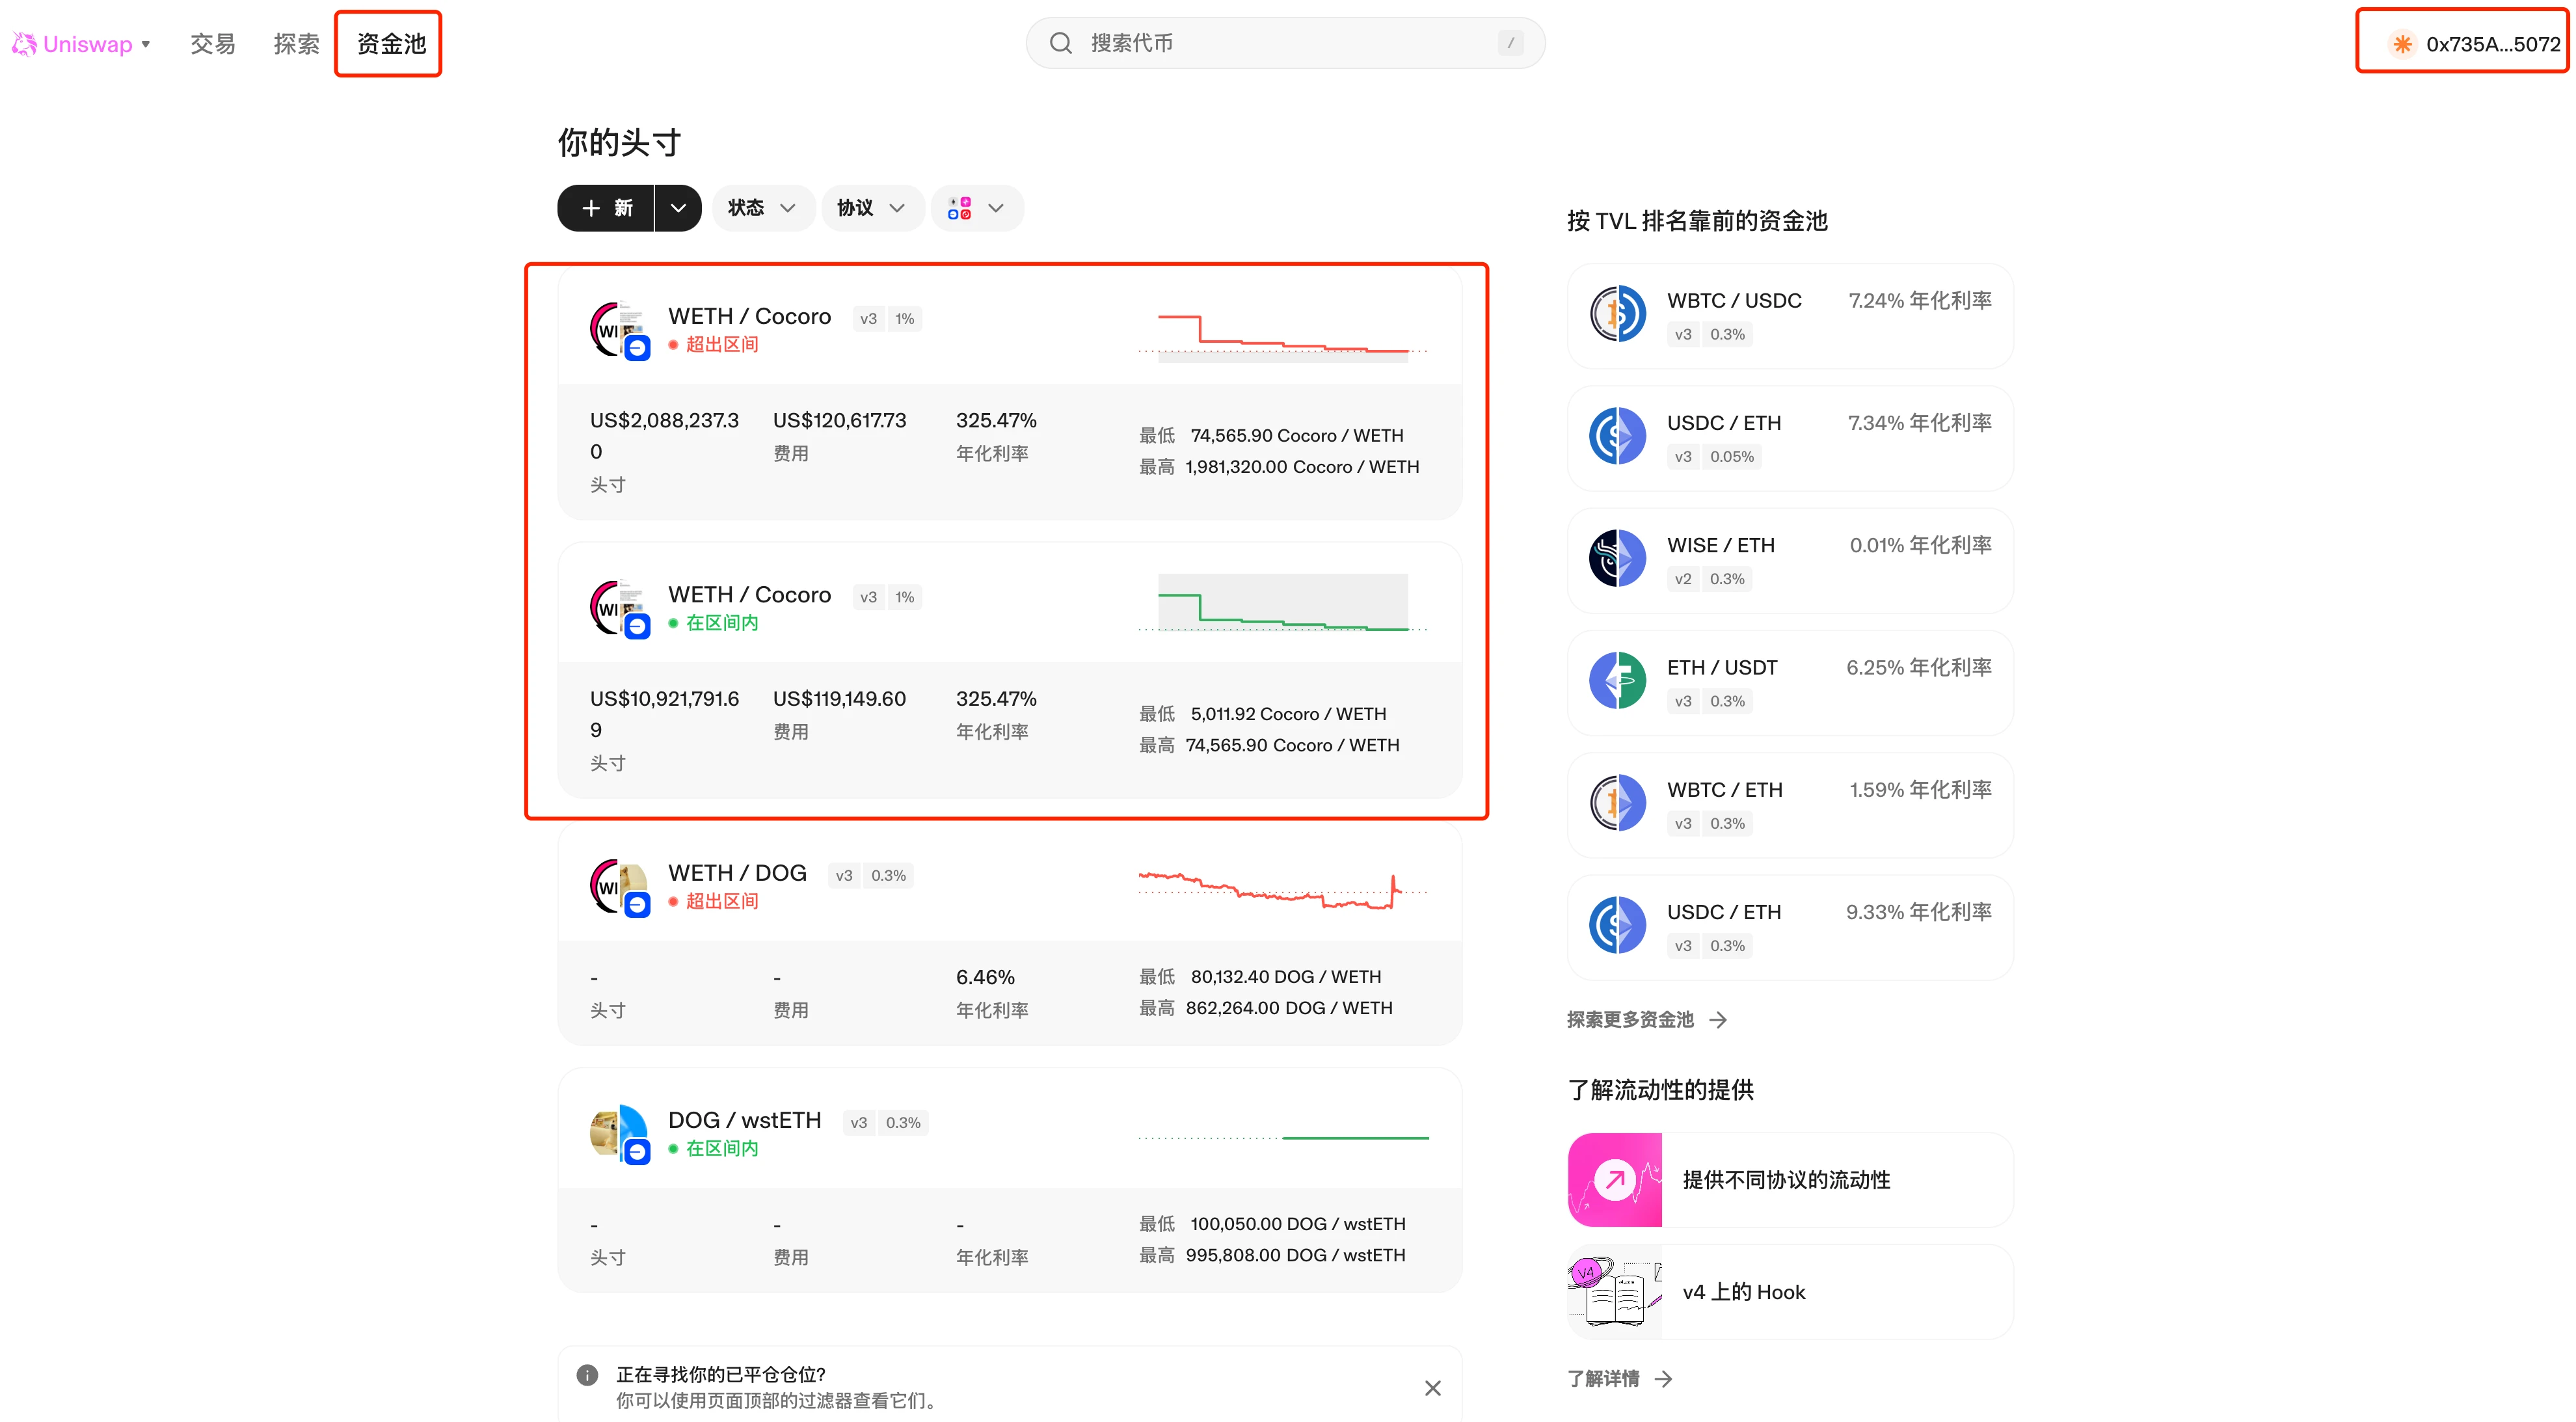
After the scan is successful, the web page is connected to the wallet. The connected wallet address can be seen in the upper right corner of the web page. The pool information can be seen in the [Fund Pool] column. There are two pools for $cocoro, one of which has exceeded the range and the other is within the range.
Click on the pool to see detailed information, such as the lowest price, highest price, and current price in the price range. You can also see the number of weth and cocoro currently remaining in the pool, as well as the unclaimed handling fees.
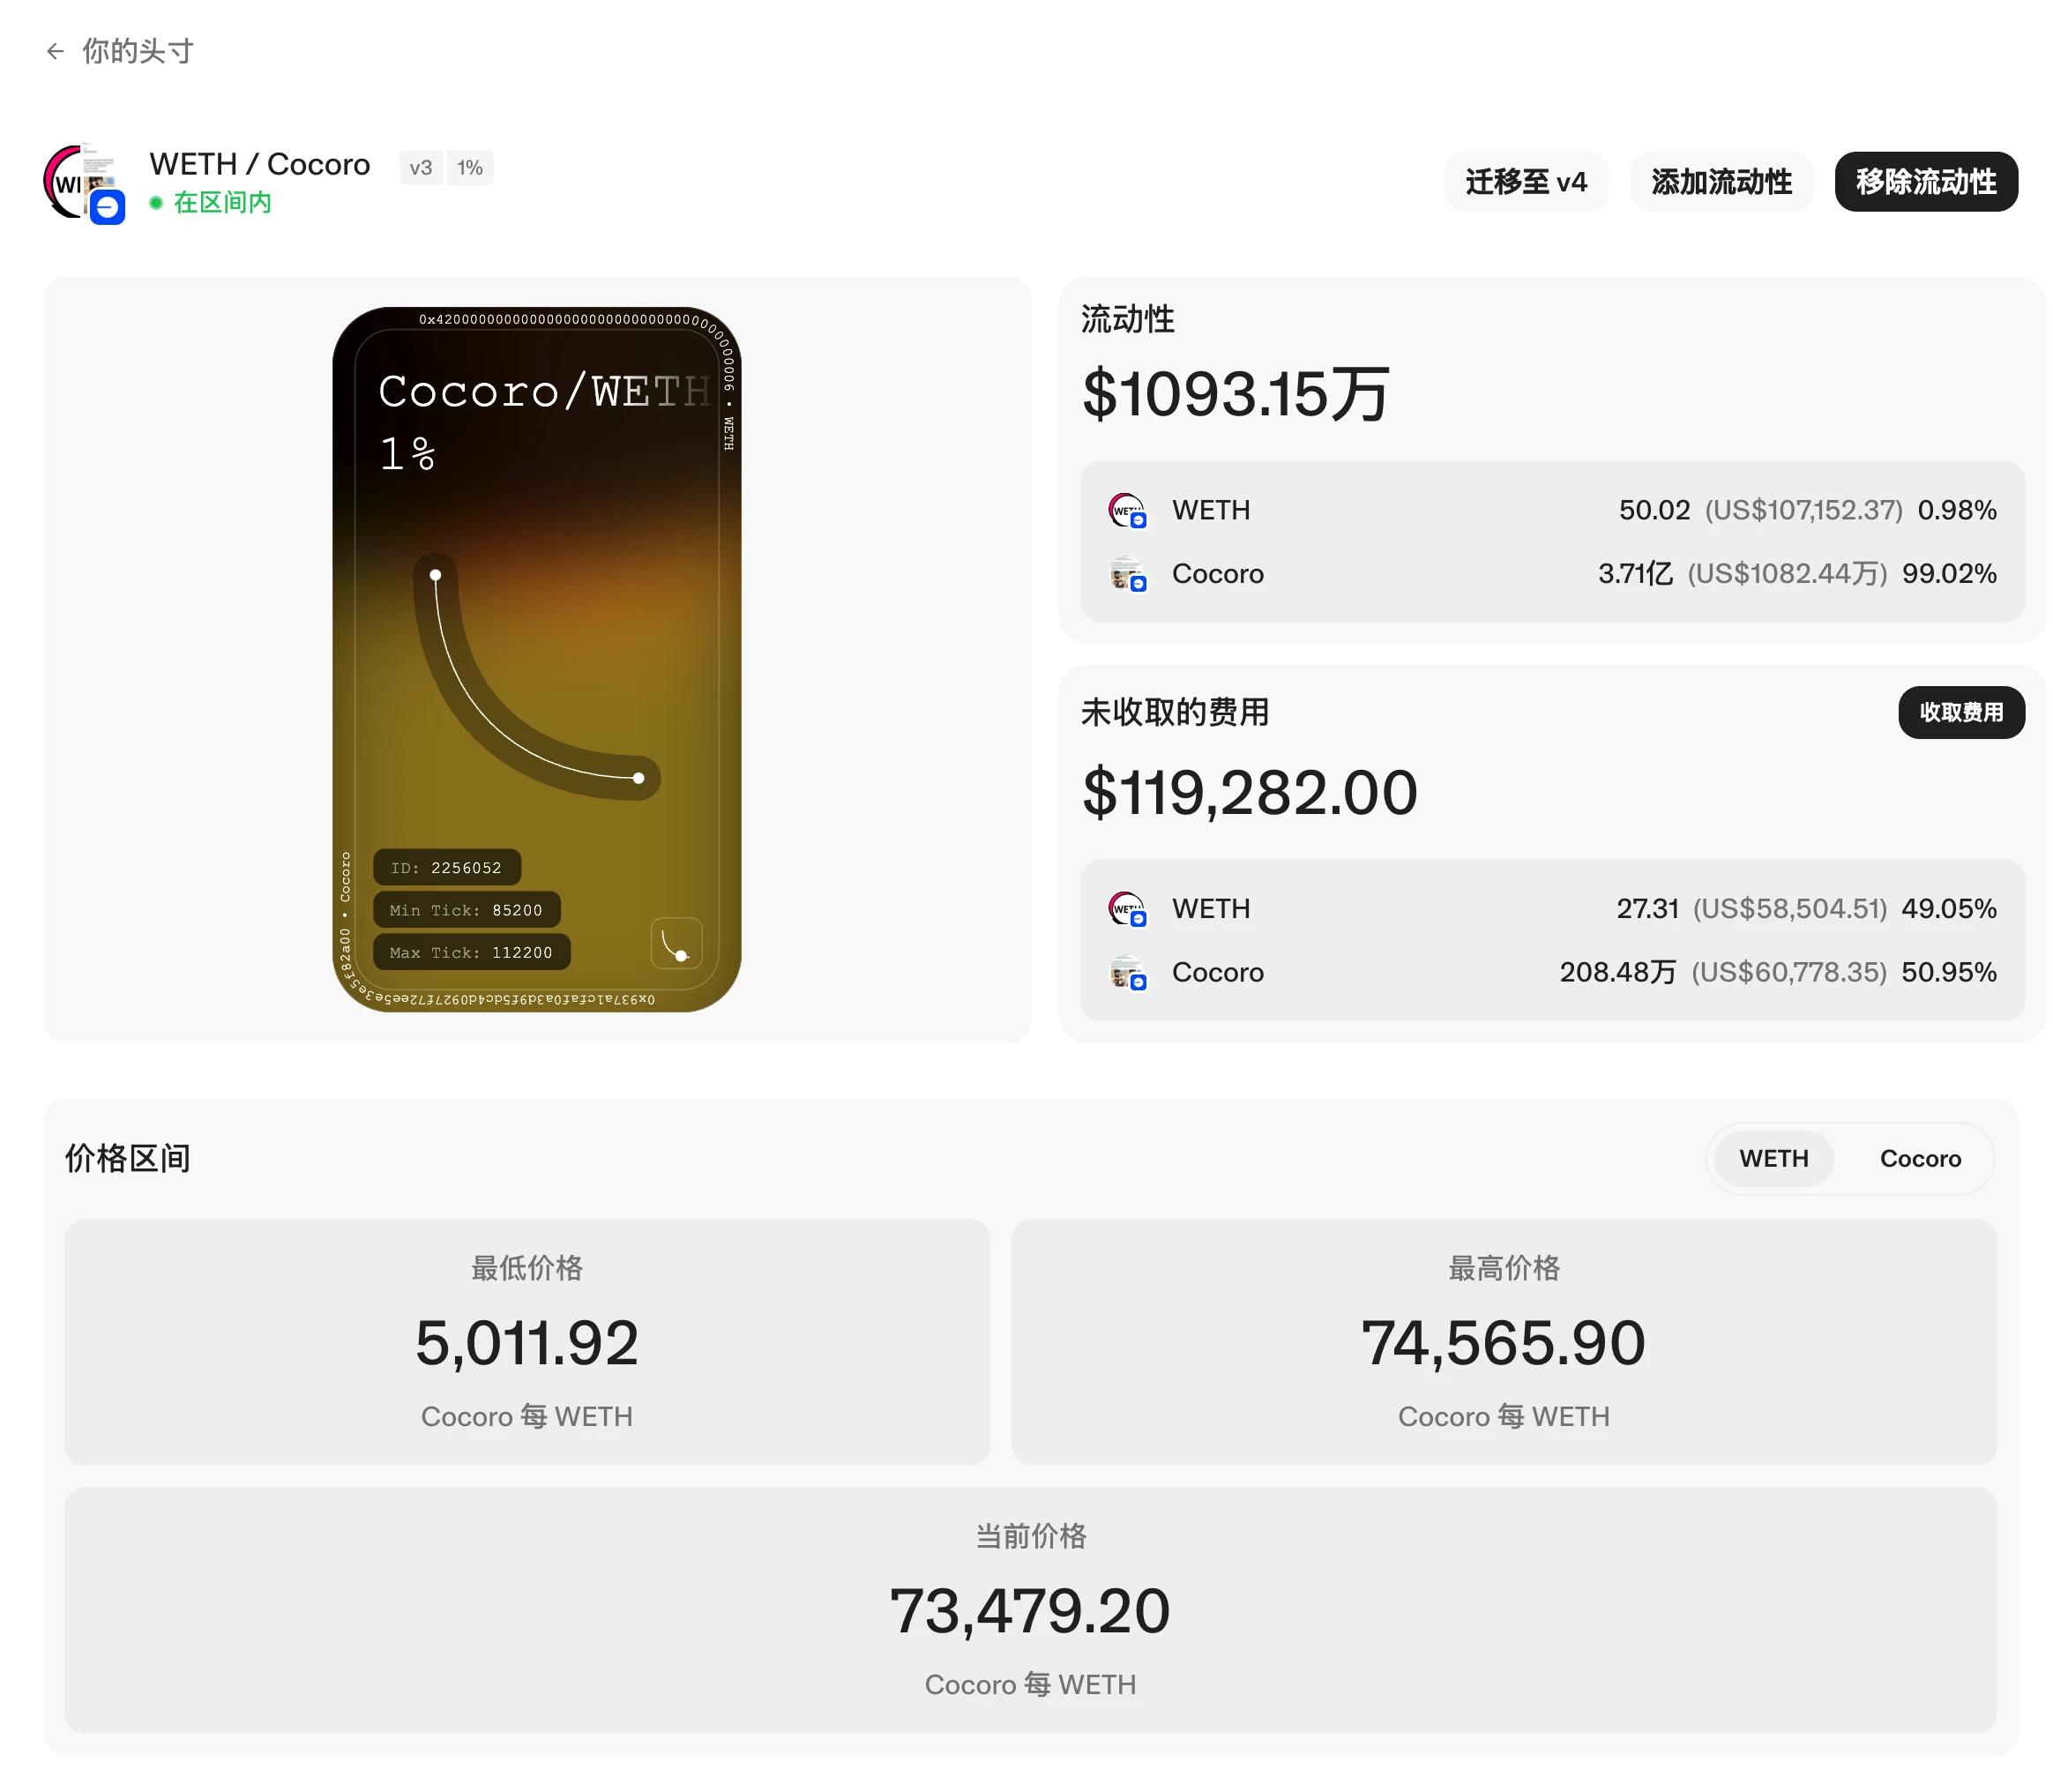
Currently, the unclaimed fees in the two pools are 120,000 U and 119,000 U respectively. According to the content of Chapter 2, Section 4, the collected fees are 1.7 million U. The project party currently earns a total of 1.94 million U in fees.
The advantage of this viewing method is that Uniswap is natively supported, but the disadvantage is that you need to download the APP.
2. Directly view the website
From the previous section, we can know that the URL of the pool is https://app.uniswap.org/positions/v3/base/2256046, where the last number in the URL is the Token ID of the NFT. In Section 3 of Chapter 2, we have found that the Token IDs of the NFTs corresponding to the two pools are 2256046 and 2256052, respectively, so we can construct the viewing URLs of the two pools respectively, namely:
https://app.uniswap.org/positions/v3/base/2256046
https://app.uniswap.org/positions/v3/base/2256052
You can query the detailed information of the pool from the two URLs above.
The advantage of this method is that you can construct a URL for quick and easy viewing, but you need to query the Token ID of the NFT corresponding to the pool in advance.
3. Use impersonator to simulate
impersonator is an open source project (https://github.com/impersonator-eth/impersonator) that can simulate any Ethereum address to log in to dapp through WalletConnect or iFrame.
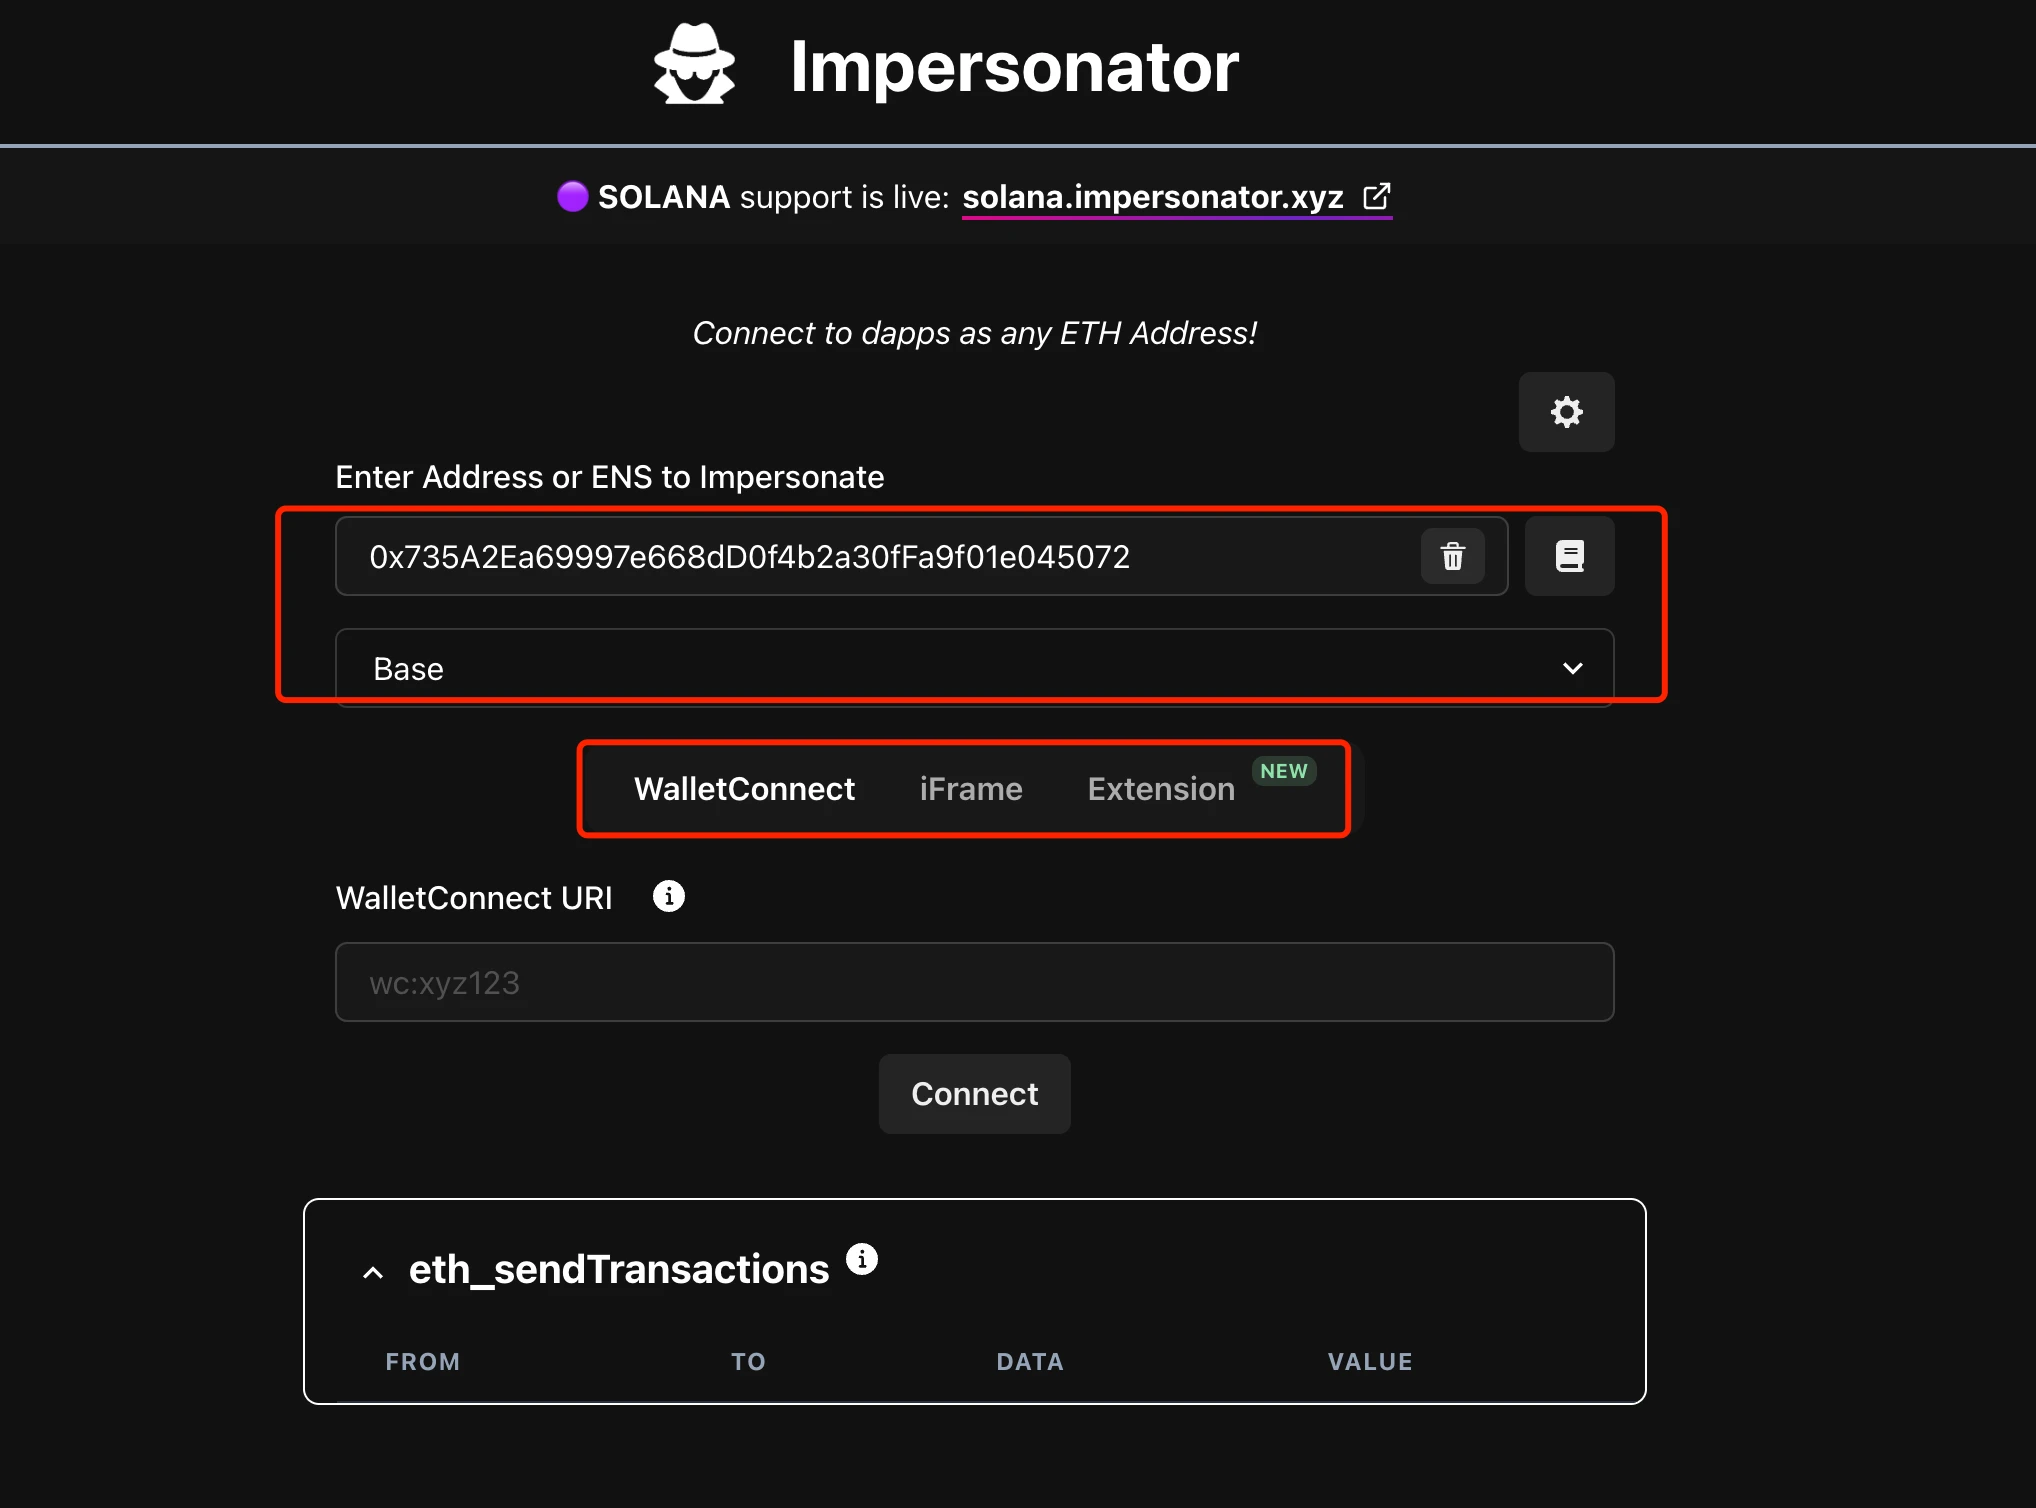
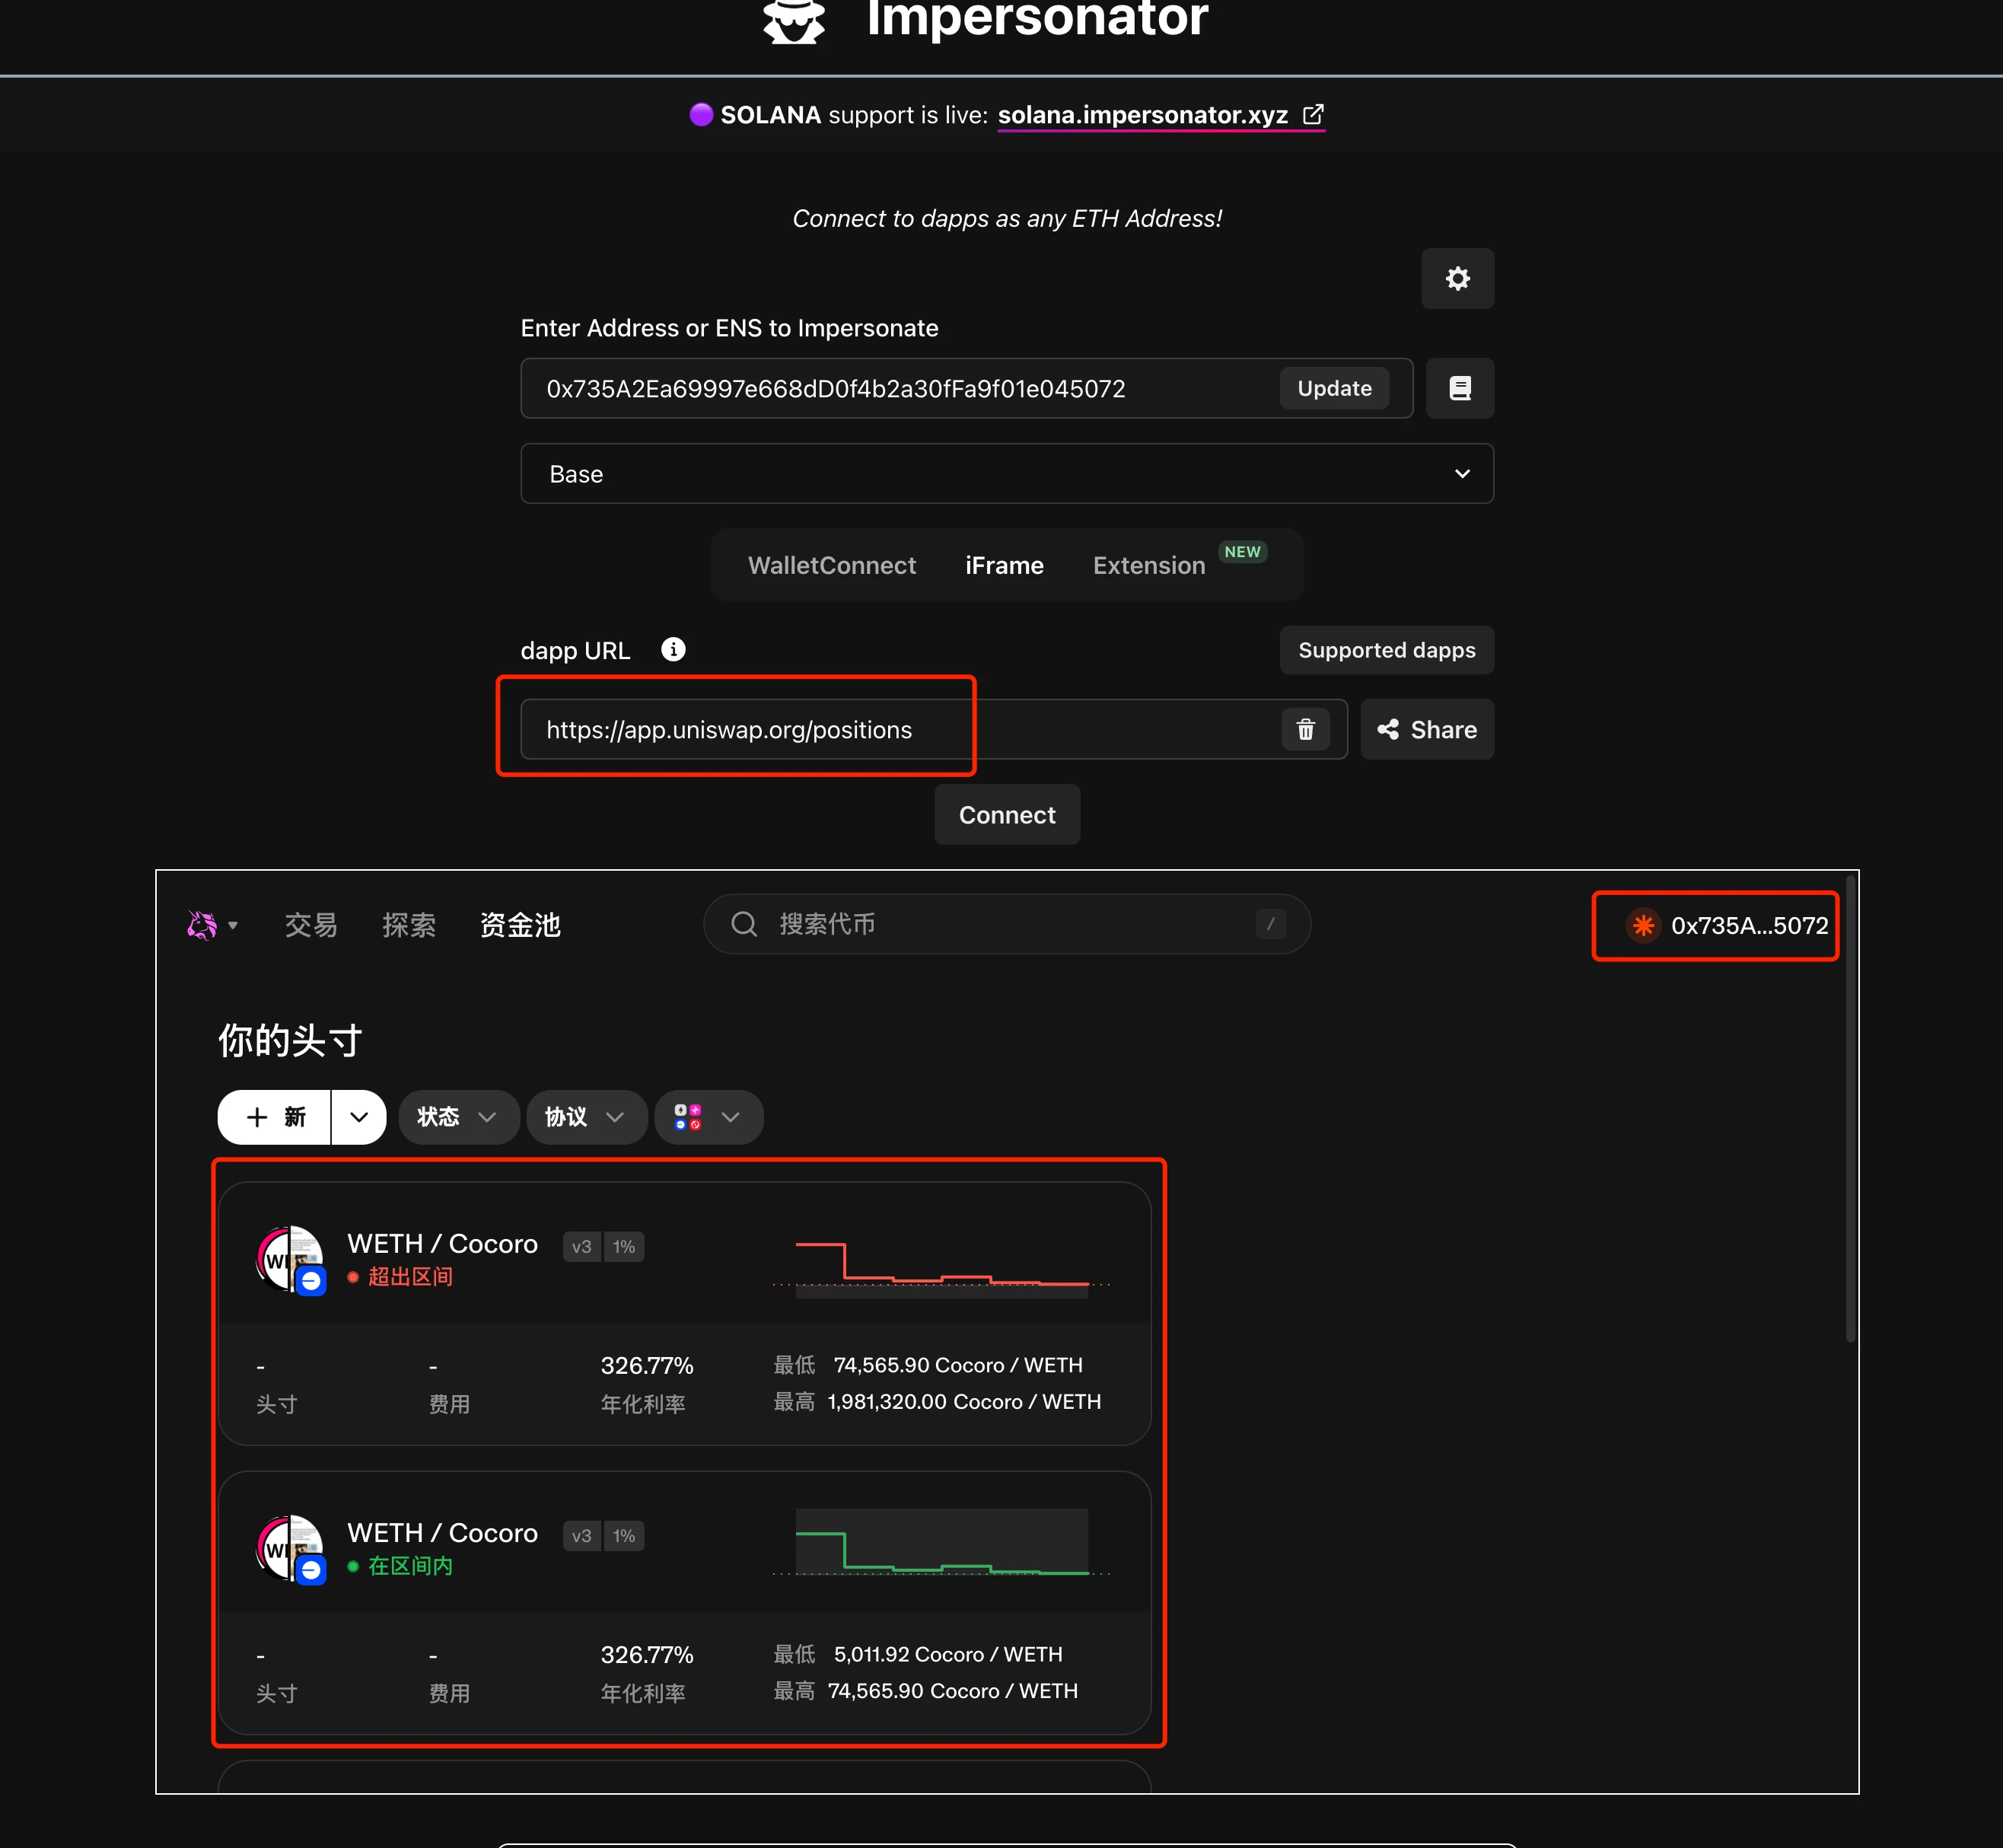
Open the official website of impersonator https://impersonator.xyz/, you can see that you need to fill in the wallet address and select the chain. Here, fill in 0x735A2Ea69997e668dD0f4b2a30fFa9f01e045072 as the wallet address, select Base for the chain, and three simulation methods are supported below: WalletConnect, iFrame, and Extension.
(1) WalletConnect method
To use the WalletConnect method, we need to open the Uniswap webpage first, and select [WalletConnect] in the upper right corner [Connect]
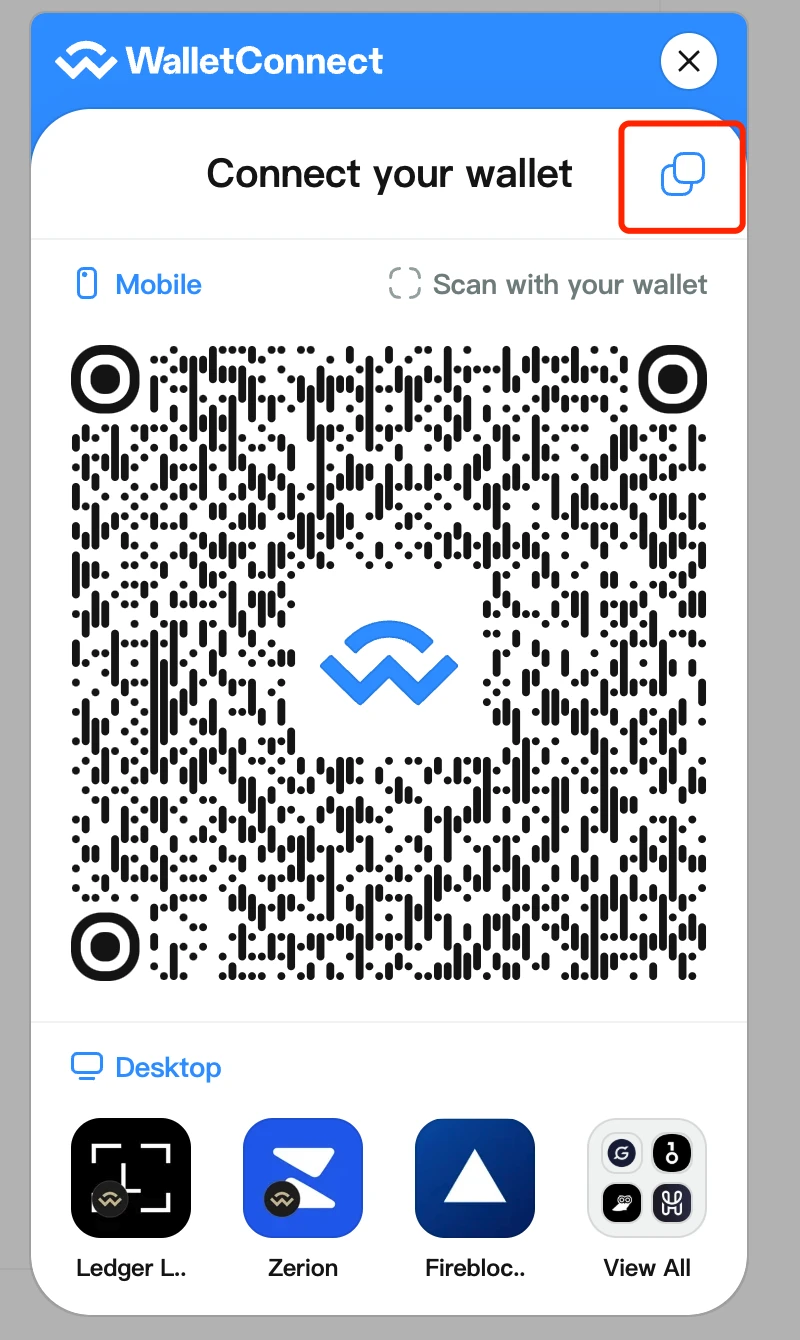
Click Copy on the WalletConnect QR code page that appears, and then paste the content into the WalletConnect URI on the impersonator website. The Uniswap website will then connect to the address entered above, and you can view the pool information.
(2) iFrame method
It is relatively simple to choose the iFrame method. Just enter the Uniswap URL in the dapp URL field and click Connect to display the URL interface of the wallet connected to Uniswap. You can now view the detailed information of the pool.
Some dapps may not support this method. If not, you can choose the WalletConnect method in the previous section to view it.
The Extension method is simulated through plug-ins, which will not be studied here.
Impersonator currently also supports simulated login dapps of Solana chain wallet, but currently only supports WalletConnect. In the previous article Hand-in-hand tutorial: quickly master the method of viewing the price range of Meteora liquidity , we chose to use the observation wallet to view, and then we can use Impersonator to simulate login. Unfortunately, Meteora currently does not support the WalletConnect method to connect to the wallet.


